
Add sharpness to eyes in a photo
March 3, 2017 at 6:30:13 PM GMT+2Contents
This lesson is part of a larger section on retouching eyes photos in Photoshop. For a more detailed study of photo retouching we recommend you to read the other articles on the topic:
- Contrast enhancement in the pupil
- Darkening the edges of the iris
- Add expressiveness to the eyes
- The creation of new and adjustment of existing glare
- Lightening the whites and the orbits of the eyes
- Remove the red veins in the eyes
- Change the color of the eyes
- Increase and decrease the size of the eye
- To replace one eye with another
- Retouch of the eyelashes
- Correction of the shape of the eyebrows
- The creation of thick eyebrows
- Darkening the eyebrows
- Add sharpness to eyes
The sharpness to the eyes image should be added in the last step of retouching. This action of retouching emphasizes the model's eyes in the photo. Sharpening of the eyes is an example of a local sharpening, which significantly changes the appearance of the photo. All the actions will be performed with the help of tool Photoshop, which was significantly modified in version CS5.

Step 1
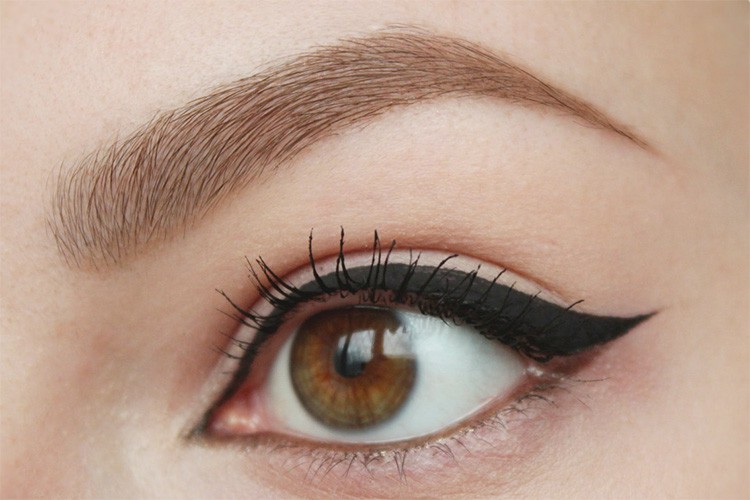
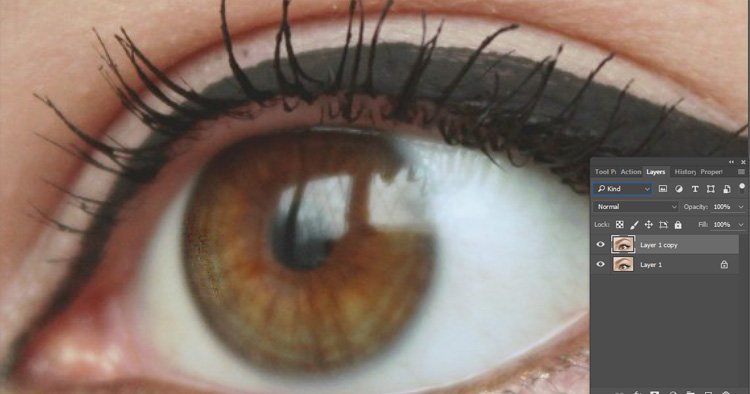
Here is a picture we have to work with. It is better to work on the copy layer. This gives you possibility to assess the effect when activating and deactivating the visibility of the layer; it also allows to reduce the opacity of the layer if the effect is excessive; and at last you can just delete this layer if the effect is not necessary. So, use the key combination < Ctrl + J > (<Ctrl+ J >) to copy the background layer image.
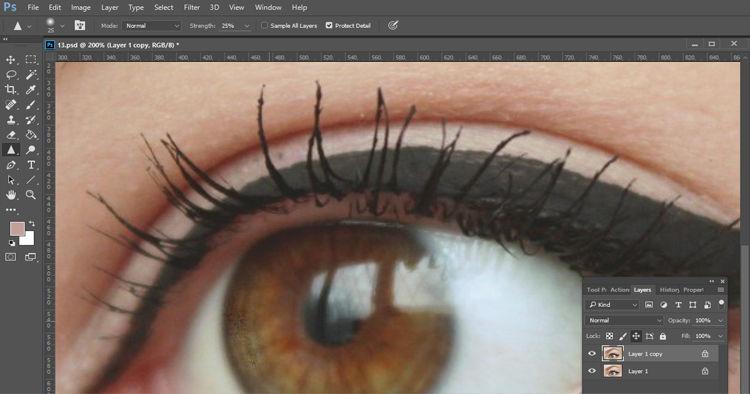
On the toolbar, in the same cell where the Blur tool is located, you'll find the Sharpen tool. The Sharpen tool was used by a very few people, because it always did more harm than good. It seemed that this instrument had a personal hostility to the pixels, so it destroyed them by creating excessively dramatic effect of sharpness. But in the new versions of Photoshop it is fixed. In the end, Adobe has created the perfect tool of sharpening that you can activate by clicking on the check box Protect Detail, which appears in the options bar. Never forget to check the box, otherwise the tool Sharpen will ruin the picture.
Step 2
Zoom in on the eye, activate the Sharpen tool and drag the pointer over the iris. As default, on the settings panel the parameter Strength is set to 50%. Reduce this value to 25%, to be able to increase the effect (as necessary) due to the sequential applying of the several paint strokes. This allows you to achieve even more precise control over the created effect, given that you are working on a separate layer. Do not draw all the eye — the sharpness is evident at the edges of objects. Choose a brush size that only slightly overflows the iris of the eye. Remember that the effect can always be reduced by reducing the opacity of the layer. At any time, you can adjust the degree of sharpening in the image of the eye.
Step 3
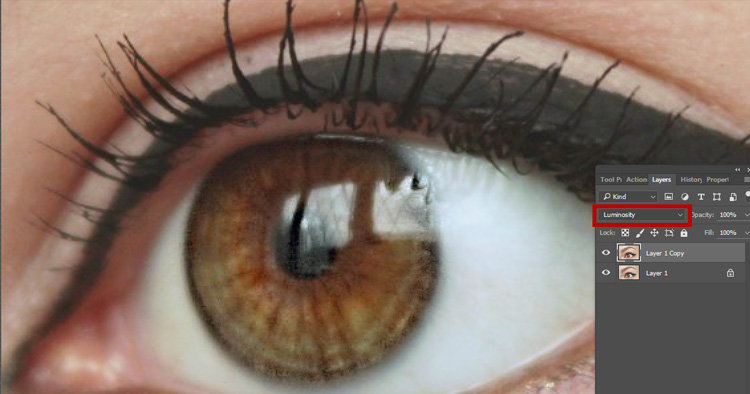
The process of sharpening may occur digital noise or even change the color of the edited fragment, so change the layer's blending mode to Luminosity.
Video tutorial