
Remove flash glare
March 22, 2017 at 8:39:42 PM GMT+2Contents
This lesson is part of a larger section on retouching skin in Photoshop. For a more detailed study of photo retouching we recommend you to read the other articles on the topic:
- Removal of blemishes and skin imperfections
- Quick skin smoothing
- Skin smoothing preserving its texture
- Skin enhancing and adding texture
- Smoothing the skin using the color channels
- Remove or reduce wrinkles
- Removing flash glare
- Skin tone harmonization
- Makeup photo editing
- Creating a porcelain skin effect
- Sharpening of portrait photos
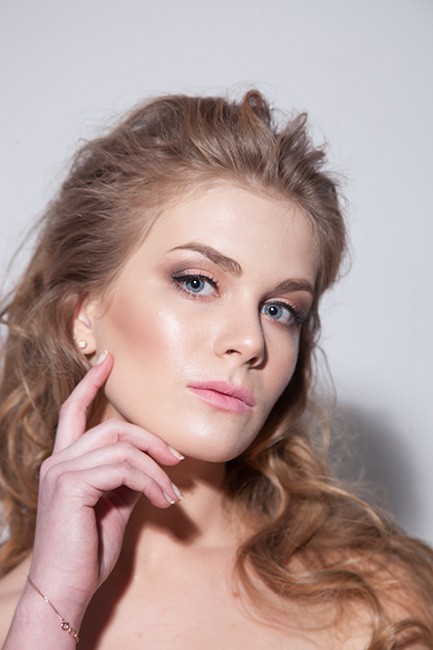
Sometimes the flash light reflects from the model’s face and it seems like the person in the picture sweats a lot. Well, even in the Studio the make-up artists are doing everything to ensure that the light from the flash is not reflected from the faces of the models, but sometimes it still fails to avoid such issues. If there are some pictures in a shoot which have such a defect, we will show how to get rid of it easy and fast.

Step 1
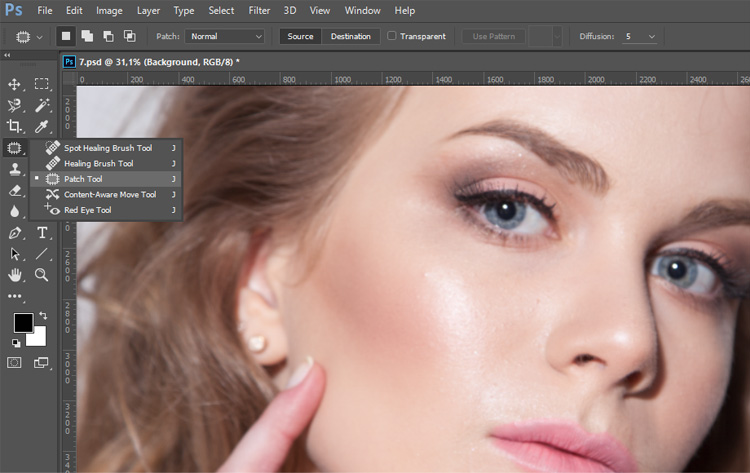
We have a picture with the flash glare on model’s forehead, nose, right cheek and chin. To remove such glare, it is great to use the Patch tool, which is shown in the figure, although for the same purpose you can use the Healing Brush tool. However, if you use the Healing Brush tool you need to remove glare with one stroke of the brush (a little later, you'll understand why).
Step 2
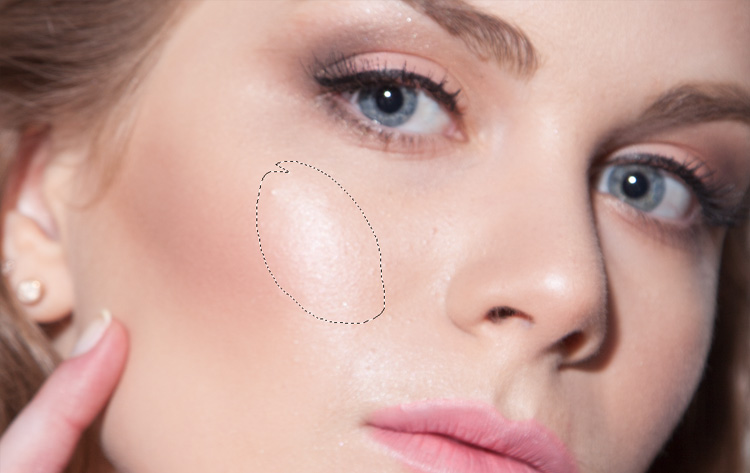
Increase the scale for a fragment with the image of the model’s face and using the key combination < Ctrl + J > (< ⌘+ J >) duplicate the background layer of an image. All the operations we perform on a separate layer. Using the Patch tool, select the glare. This tool creates a dedicated area in the same way as the Lasso tool, so it is simply to use it.
Step 3
Click on the highlighted area and drag it to another area of the skin with a similar texture, which has no flash glare on it. Release the left mouse button (or lift the pen from the tablet), and the highlighted area returns to its original position, but the glare on the skin will disappear. Unfortunately, the edited area has changed its color and image in general has lost its original depth, which occurs as a result of light reflection. Therefore, we will not remove a bright area completely, we only try to weaken it. Will do this in the next step. Now do not cancel the created selection as we still need it.
Step 4
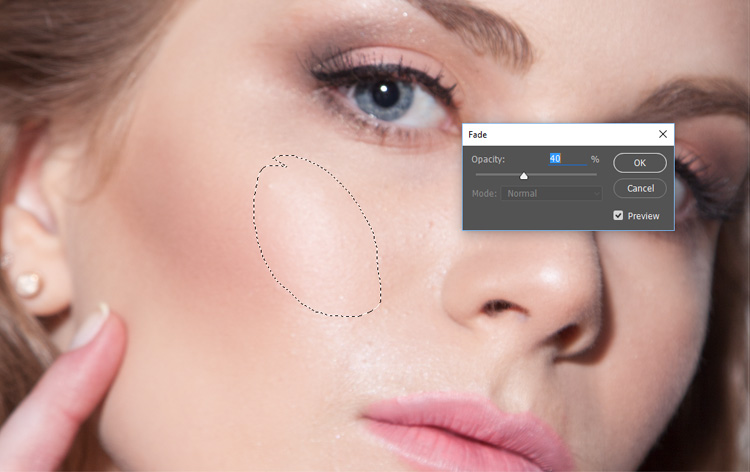
Press the key combination < Ctrl + N > (< ⌘+ N >) to hide a dotted line around the selection. In the Edit menu, select Fade Patch. In the dialog box, you can modify the effect using the available slider. If you leave this slider to position 100%, then the effect will remain unchanged. If you reduce the value of this parameter to 0%, then the effect will be completely removed from the image. Thus, our task is to weaken the effect so that the editable area is brighter, but the flash glare is not visible. In this case the optimal value is 40%. Click on the OK to complete the retouching of the glare.
Step 5
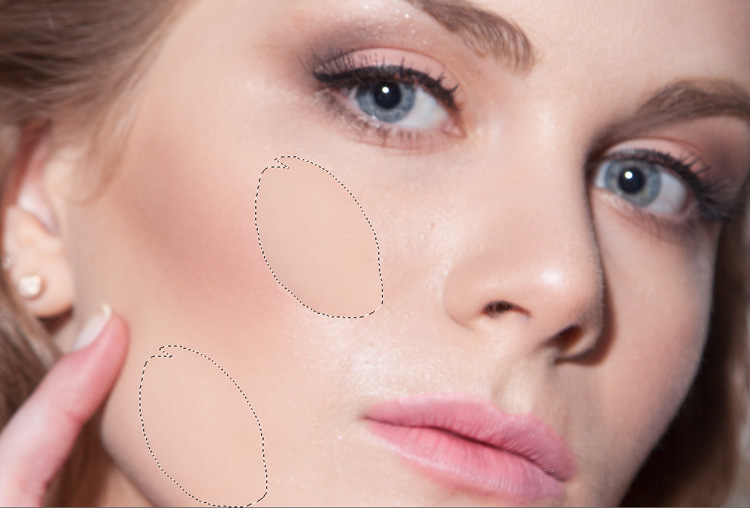
In the same way remove any remaining glare in the image. Don't be surprised if in each case you need to weaken the effect to different degrees. It is important to remember that the Fade command can be used only after you create the effect (fortunately, pressing the key combination < Ctrl + N > (<⌘ + N >), which we use to hide the secretory line, Photoshop does not consider as a separate command.) Follow all steps in this sequence:
- remove the glare;
- hide dotted lines to indicate a selected area;
- use the Fade command to weaken the created effect.
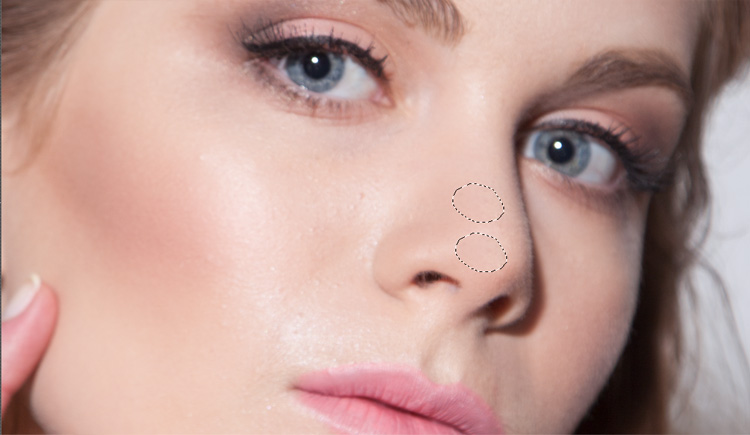
Scroll to the next glare, and drag the selection to a clean piece of skin with the similar texture.
When you're done with all the glare, do not forget that retouching is done on a separate layer, so if the retouched fragments seem too dark, you can always reduce the opacity of the edited layer. This makes all of the retouched fragments a little lighter.
Video tutorial