
Skin tone harmonization
March 31, 2017 at 9:02:42 PM GMT+3Contents
This lesson is part of a larger section on retouching skin in Photoshop. For a more detailed study of photo retouching (unless you don't want to use online photo editing service) we recommend you to read the other articles on the topic:
- Removal of blemishes and skin imperfections
- Quick skin smoothing
- Skin smoothing preserving its texture
- Skin enhancing and adding texture
- Smoothing the skin using the color channels
- Remove or reduce wrinkles
- Removing flash glare
- Skin tone harmonization
- Makeup photo editing
- Creating a porcelain skin effect
- Sharpening of portrait photos
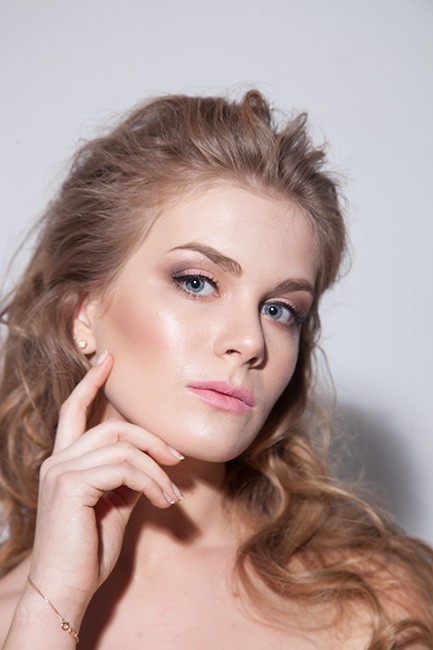
Sooner or later you will face a situation when there is a fragment of the skin which is darker or lighter than all the other skin of the model (chest, back, leg, hand or elsewhere). Such issues should be fixed when retouching images. You need to balance the skin tones before smoothing the skin.

Step 1
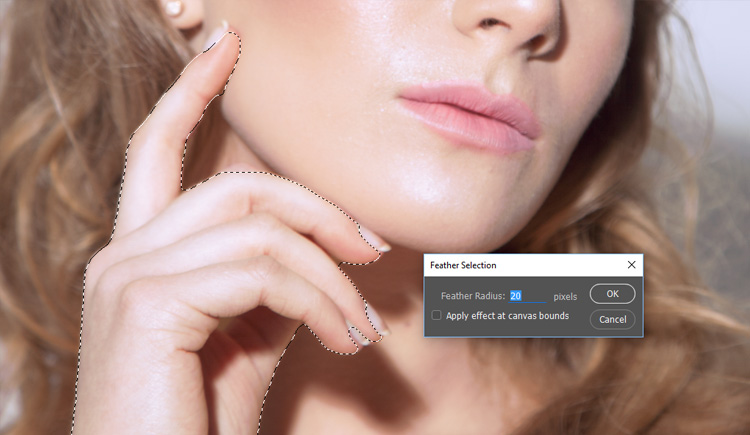
Select the skin imperfection with the Lasso tool. Try to identify this area as accurately as possible, but it is not necessary to be perfect, as the edge of the selection will be heavily feathered. Just make the selection as accurate as possible using available tools. When the desired location is highlighted, execute the command Select -> Modify ->Feather. In the dialog box that appears, enter the value to 10 pixels for the smaller selected area and 20 pixels for larger allocated area (in this case it is similar to the created).
Step 2
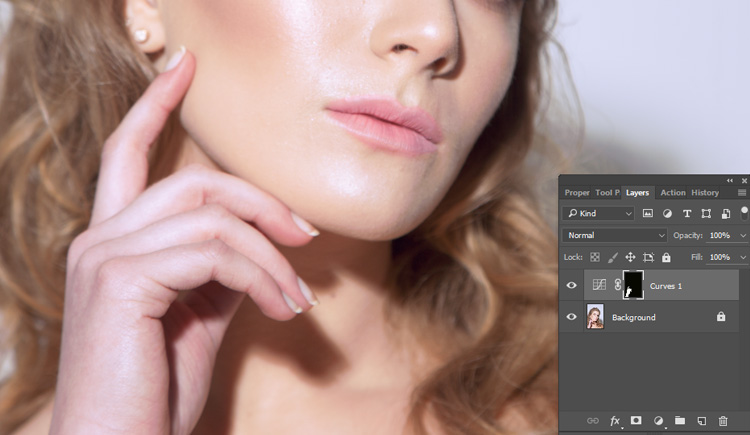
Click on the Create New Adjustment Layer icon, which is available at the bottom of the Layers panel, in the opened menu click on the Curves. Please note that the highlighted area is already masked by the created adjustment layer.
Step 3
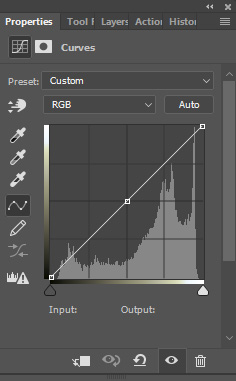
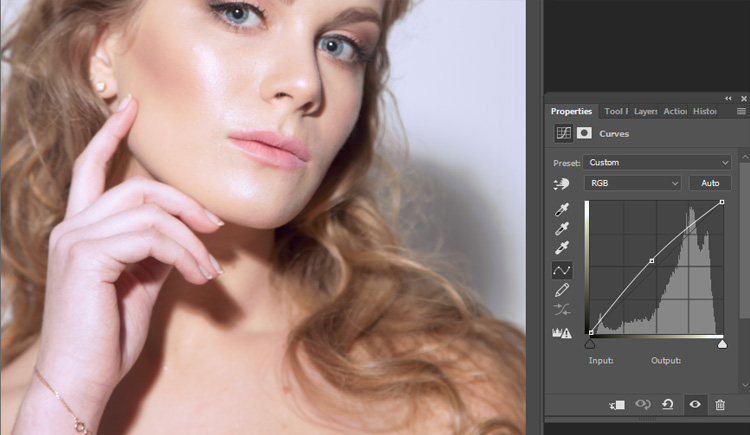
Even if you've never worked with curves, you have absolutely nothing to fear. To retouch these issue areas (to lighten or darken them, depending on the situation) you need to change the brightness of the midtones of the image. So first, in the Adjustments panel click right in the center of the diagonal line on the function Curves graph (the set point is highlighted in the figure below). So far there is nothing difficult, isn't it? Just click on the center of the line.
Step 4
Now you need to drag diagonally upwards the created point (towards the upper left corner of the chart) to lighten the midtones of the image. Watch how the editable part of the image changes. You need to drag a bit a point on the graph to even out the tones of different areas of model’s skin (try it for yourself and you will realize that everything is much simpler than it sounds). If you need to darken the issue area, then drag the center point on the chart downward in the diagonally direction (in the direction of the lower right corner of the chart).
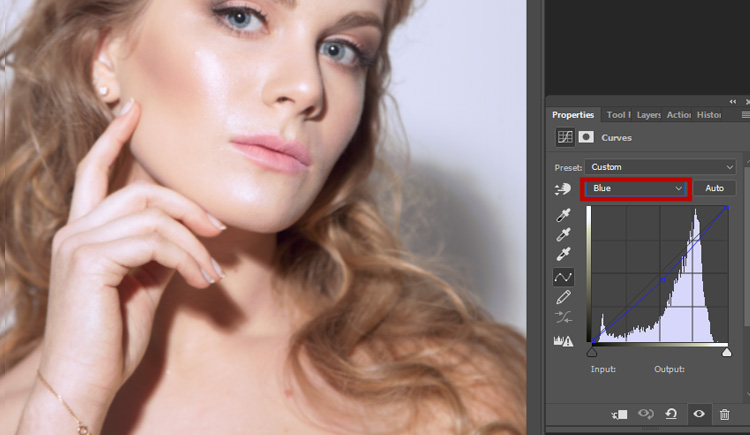
Step 5
In our case, changing the brightness did not help to harmonize skin color. The arm still stands out against the general picture, because it is dominated by blue hue. To fix this, select the blue channel and slightly drag the point in the lower right corner on the graph.
Addition:
If your photos still have issue areas, then fix them in the same way. When shading, use the value greater and less than those, which we chose in step 1, depending on the size of the issue area.
Video tutorial