
Photoshop vs online services for self-editing
May 4, 2017 at 12:53:29 PM GMT+3Contents
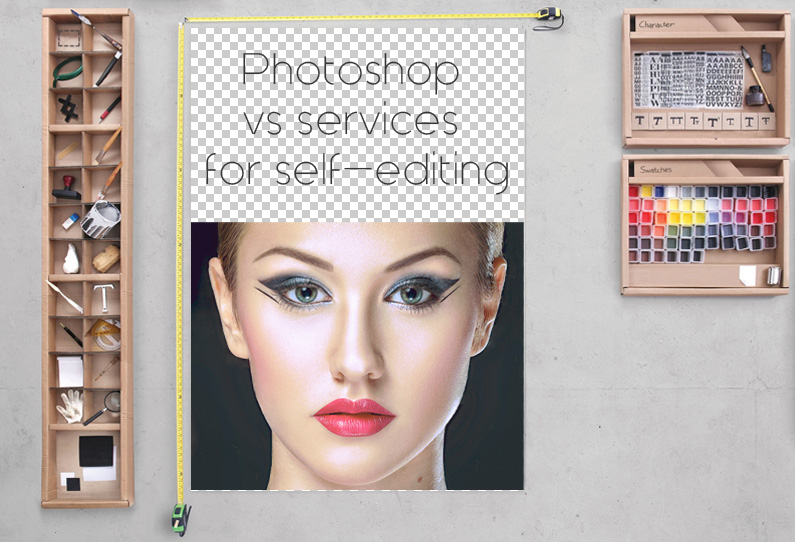
Today, there are many various ways that can help make a photo better. You can use simple methods that take no more than 5 minutes, or learn and practice professional retouching tools and composition and color reproduction rules for a few years.
- Built-in filters in your phone/camera. This method is suitable for overlaying effects or making black and white photos.
- Online photo editors, which we are going to discuss in this article.
- Desktop programs for photo processing.
Built-in filters in a camera are simple and accessible to everybody, but often photographs require a more detailed handling. For example, when you need to remove an extra object from a photo or smooth out folds in clothes. In order to do this, you can use photo editing services, online editors or professional programs, such as Photoshop.
Let’s look and compare the possibilities of popular online editors as well as Photoshop.

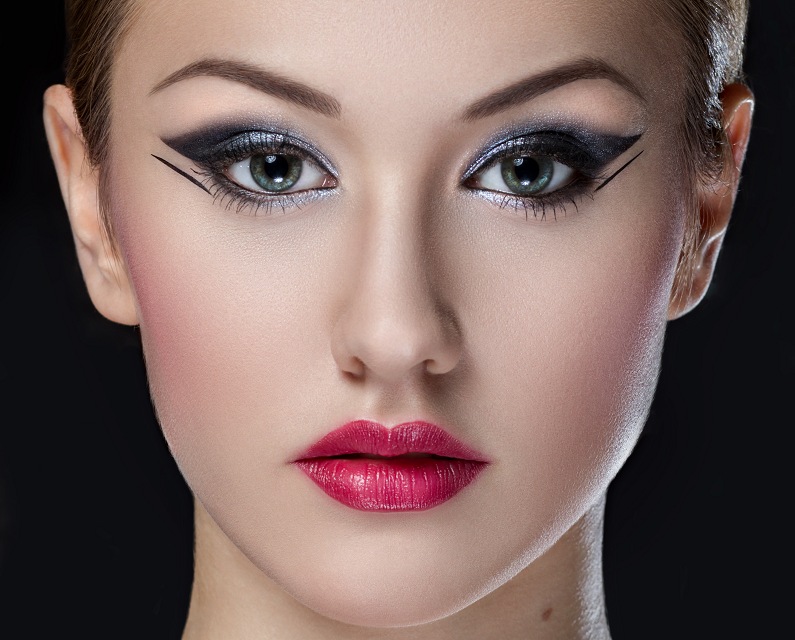
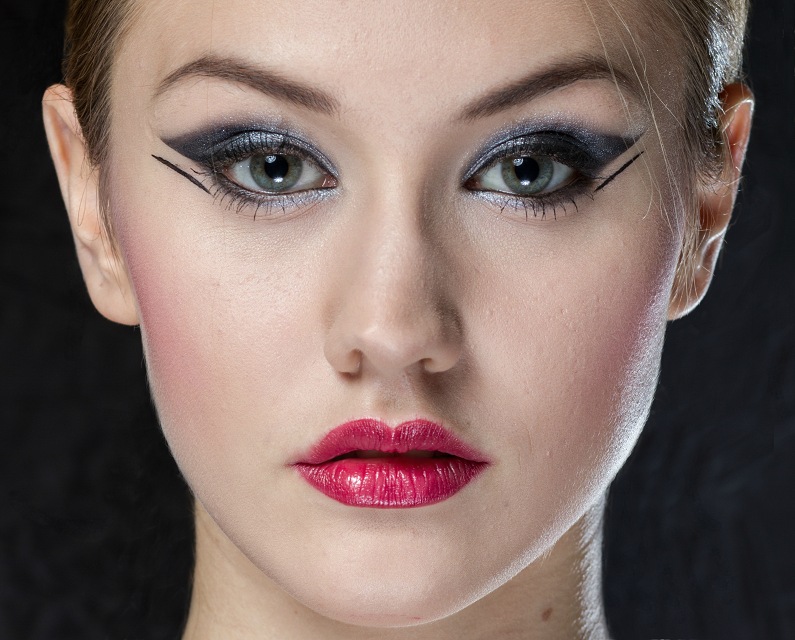
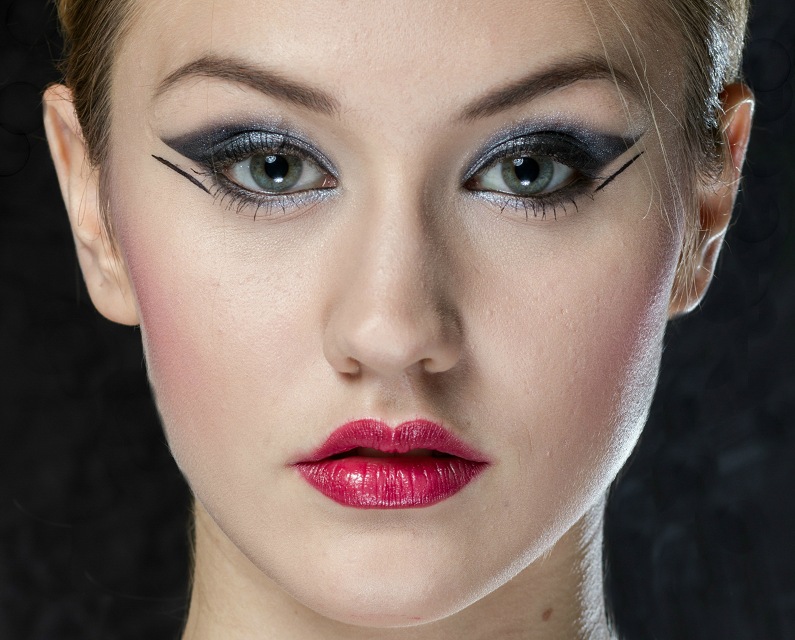
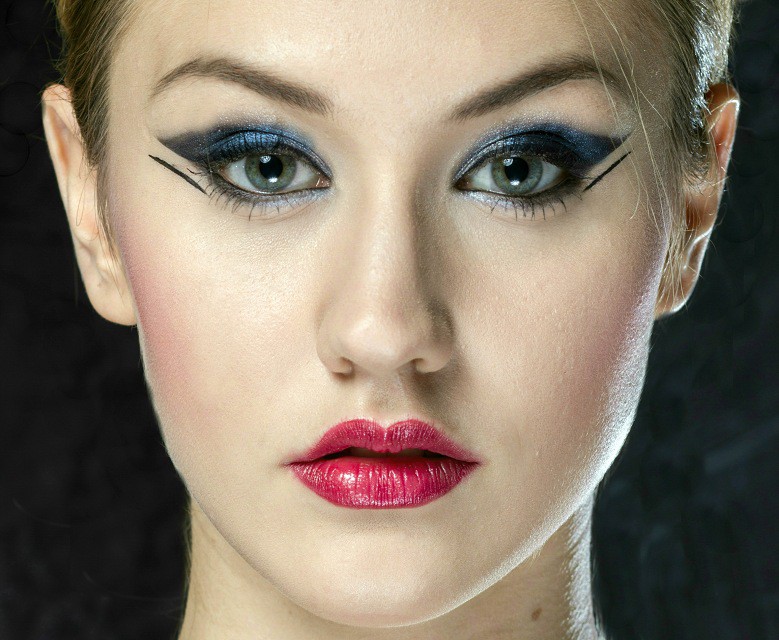
This is an original photo that will be edited in:
The steps of retouching are common to all editors:
- Removal of unwanted hair
- General liquefaction
- Elimination of major flaws
- Removal of light and shadow spots
- Detailed representation of light and shadow pattern
- Lightening of whites of the eyes
- Adding expressiveness to the eyes
- Retouching of the eyebrows
- Retouching of the lips
- Work with the sharpness
- Color Correction
For the this experiment, we will use the same photo in all editors. Editing of the images will be done by our staff expert.
Equipment used: we are going to use the same PC and graphic tablet for the handling of a photo.
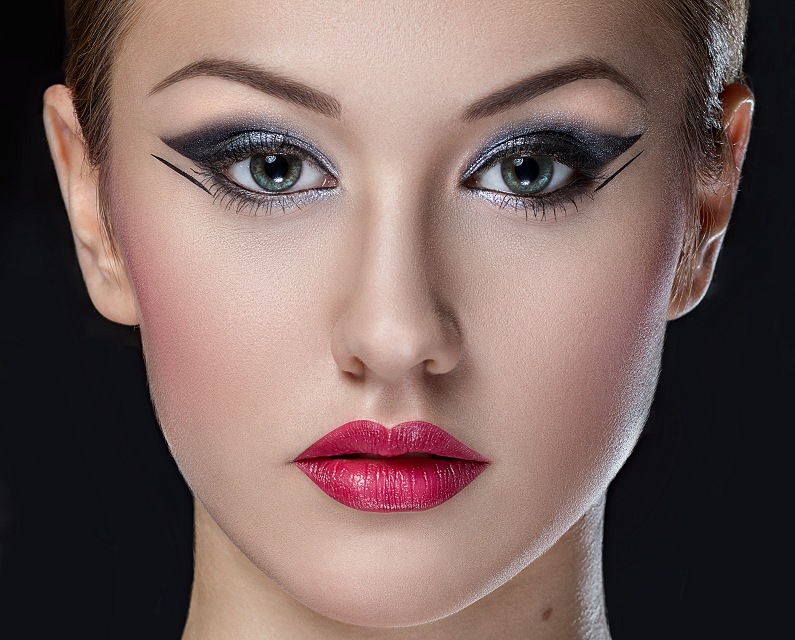
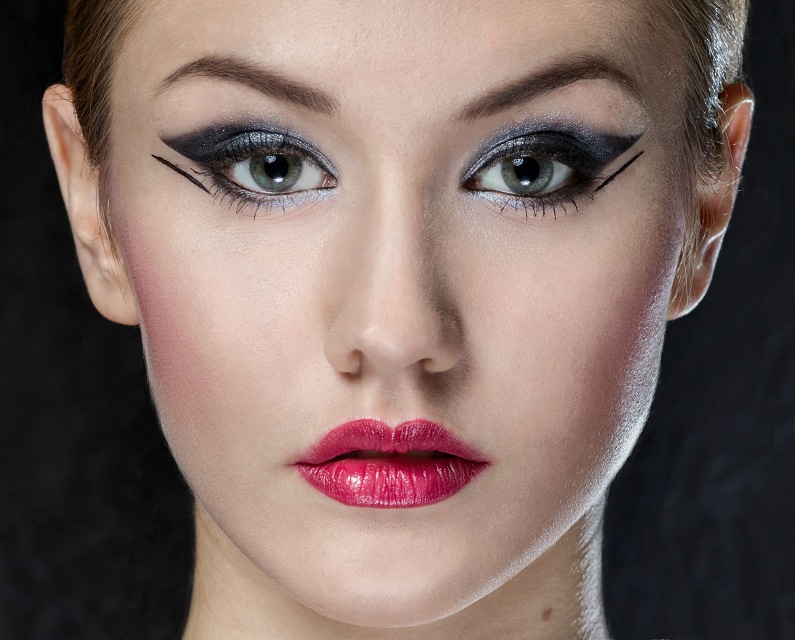
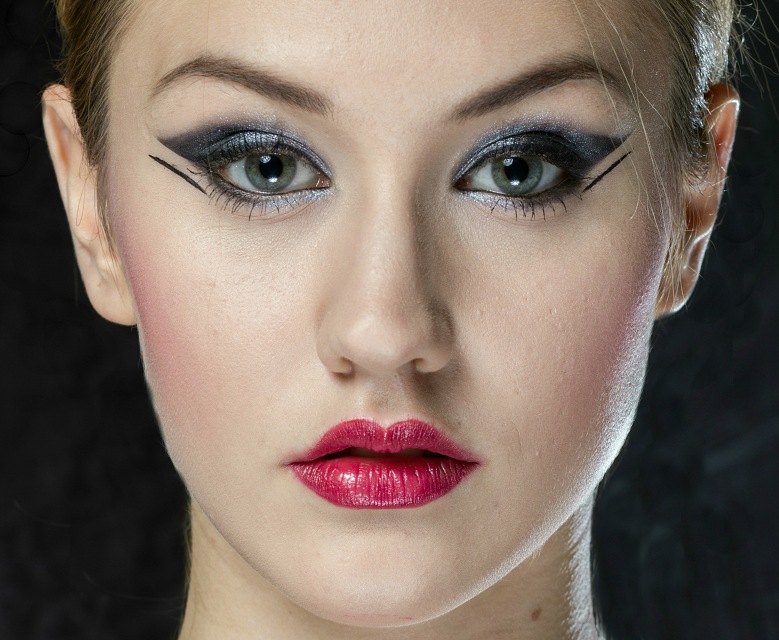
Photoshop
Step 1. Removal of unwanted hair.

We have removed all unwanted hair from the background, keeping its solid. Unwanted hairs remained only on the face. We are going to remove them in the 3rd step "Removing major flaws”.
Read the article on: how to remove unwanted hair and spots on photos
Step 2. General liquefaction.

Correction of the nose, lips, and eyebrows was done using the Liquify tool.
Step 3. Elimination of major flaws.
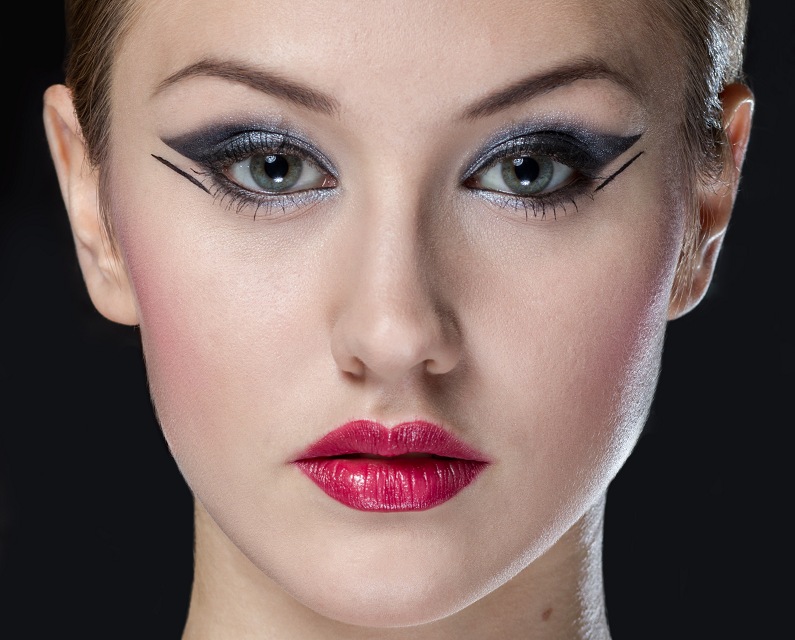
Here we have removed the following: skin imperfections, unwanted hair on the face that remained after the 1st step, and red capillaries in the eyes.
Step 4. Removal of light and shadow spots.
As a result of the work, the facial skin has become smooth, without light and dark spots, as well as all other minor faults have been removed.
Step 5. Detailed representation of light and shadow pattern.
After the previous step the face became a little flat, so now we’re adding extra volume to make the photo more expressive.
Step 6. Lightening of whites of the eyes.

Read the article on: brightening the whites of the eyes
Step 7. Adding expressiveness to the eyes.

Read the article on: add expressiveness to the eyes
Step 8. Retouching of the eyebrows.
Read the article on:
Step 9. Retouching of the lips.

Step 10. Work with the sharpness and skin retouching.
Read the article on:
Step 11. Color Correction.
This is the final stage of editing the photo. The color correction for this photo was general and made with specially set software and calibrated equipment, taking into account daylight white color. It was made for publishing on the internet in the sRGB.
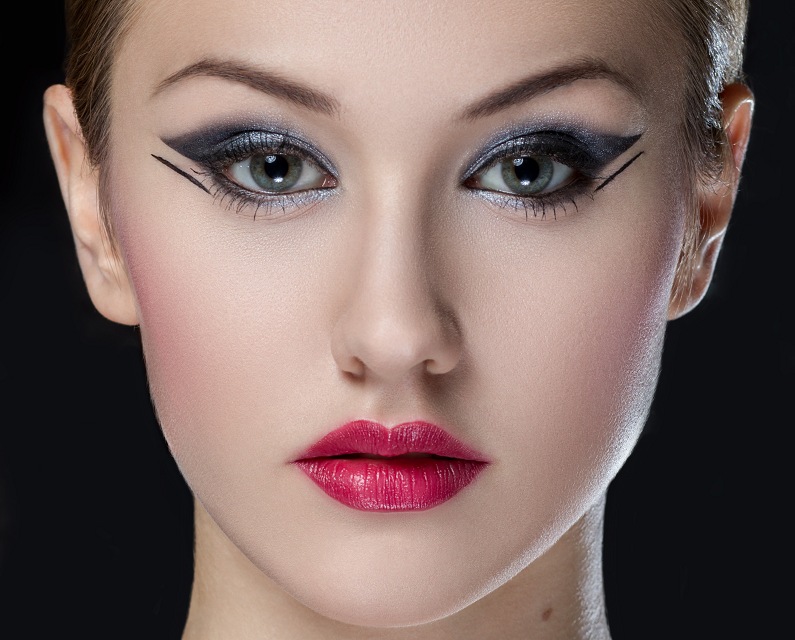
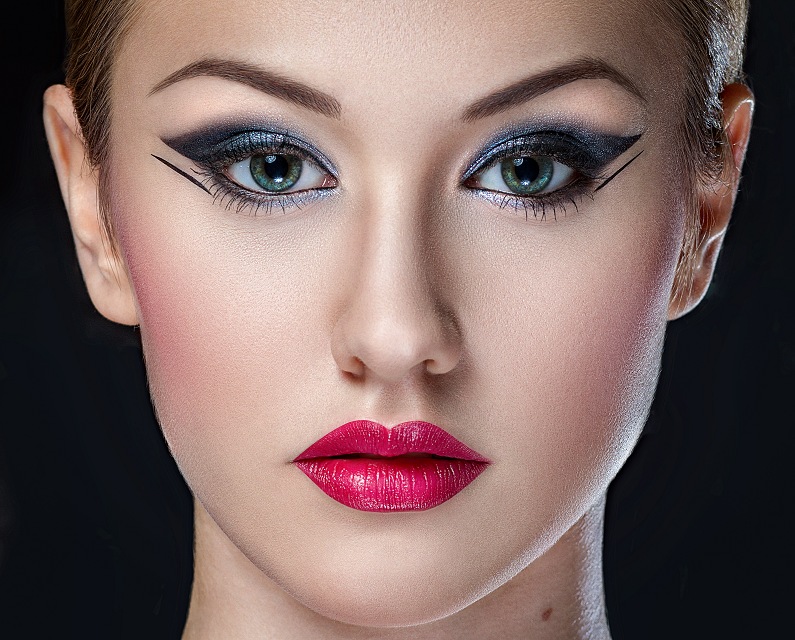
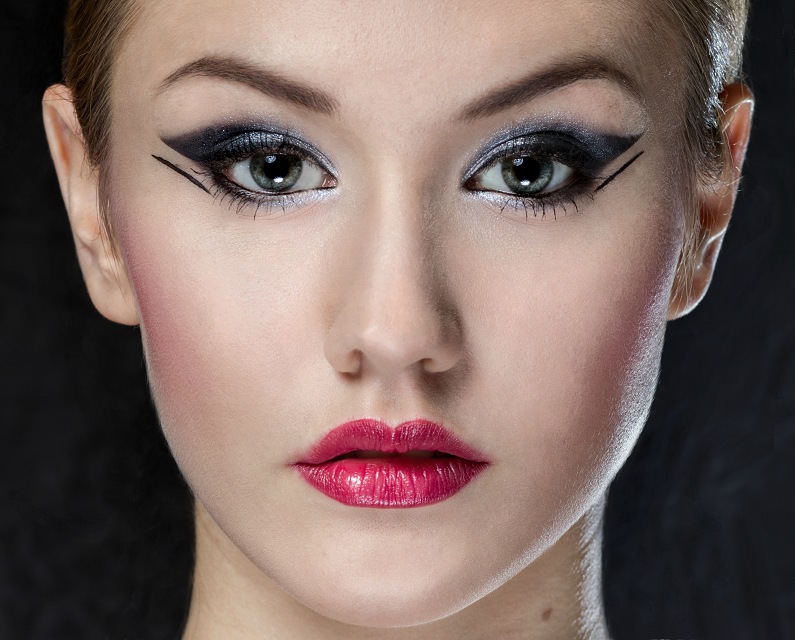
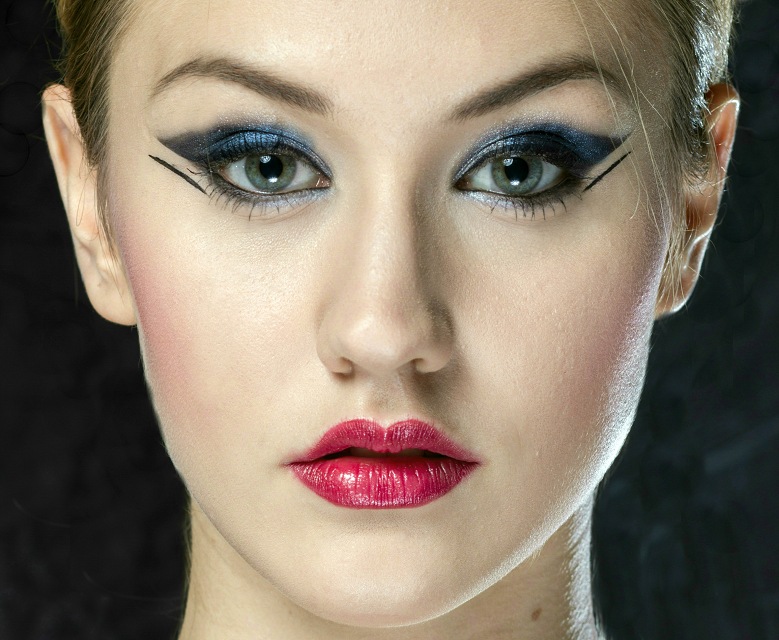
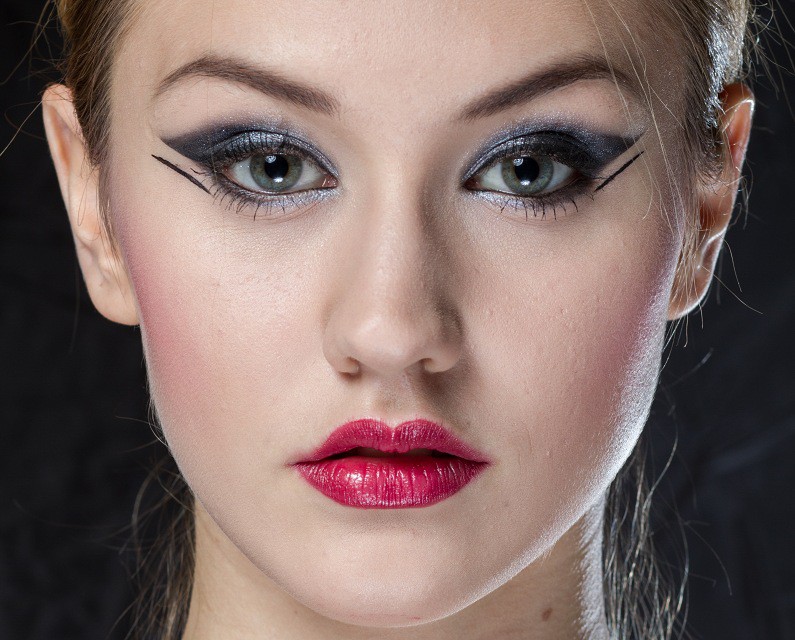
PIXLR
We are going to process the same photo using free online editor pixlr.com
Step 1. Removal of unwanted hair.
This editor, unlike Photoshop, doesn’t have Patch tool. Thus, this step took longer and the result is worse than in PS. As a result, unwanted hair was removed from the background, but it led to the appearance of spots.
Step 2. General liquefaction.
PXILR doesn’t have Liquify tool. Thus, the other two tools were used instead: Bloat and Lens Correction. The resultisunsatisfactory.
Step 3. Elimination of major flaws.

At this stage,the layers didn’t work well. The work was hampered because of the absence of Patch Tool and buzzing of the program. Healing Brush though it is, works poorly, leaving spots and almost not “healing” anything. Clone Stamp that was used at this stage proved to be great, even better than its counterpart in Photoshop.
Step 4. Removal of light and shadow spots.
This step had to be missed due to the lack of necessary instruments. Tools in the program did not have the flexibility to perform operations.
Step 5. Detailed representation of light and shadow pattern.

In this editor, detailed representation is only possible through the Dodge & Burn. This tool works well only for lighting, while the shading (the second part of this stage) does not work properly. As a result, it was possible only to slightly improve the image.
Step 6. Lightening of whites of the eyes.
Step 7. Adding expressiveness to the eyes.
Step 8. Retouching of the eyebrows.

Since the editor doesn’t have an option of using a graphics tablet, the eyebrows were drawn with the mouse. Overall, the result turned to be good.
Step 9. Retouching of the lips.
The Stamp tool was used for the correction of the lips. The result turned to be good.
Step 10. Work with the sharpness.

Tools for sharpness are not good, but they can still be used for minor corrections.
Step 11. Color Correction.

The editor has effective tools for color correction. However, the tool Curves doesn’t have sufficient flexibility and proved to be not useful.
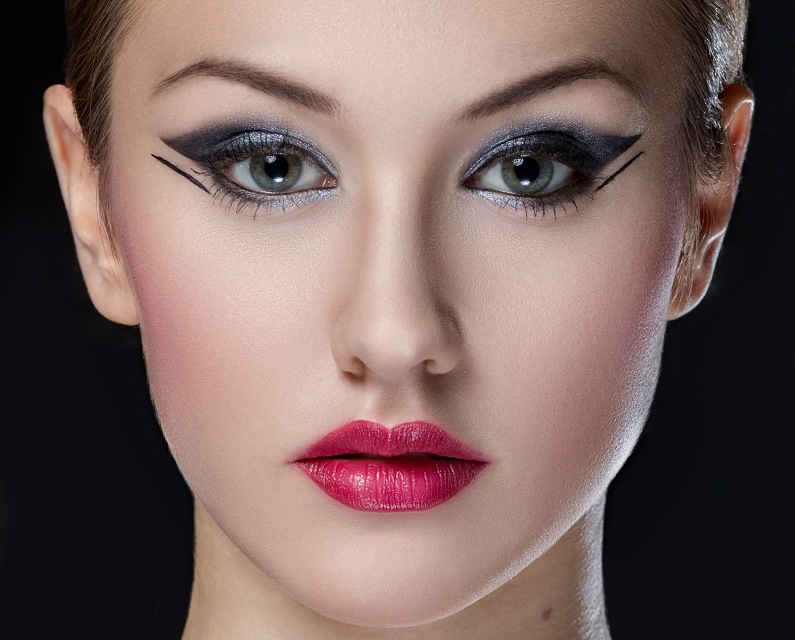
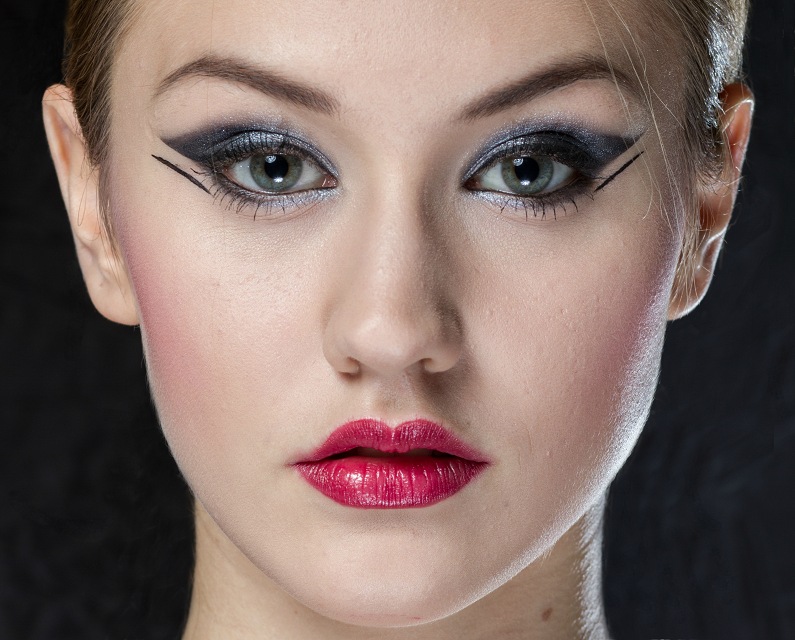
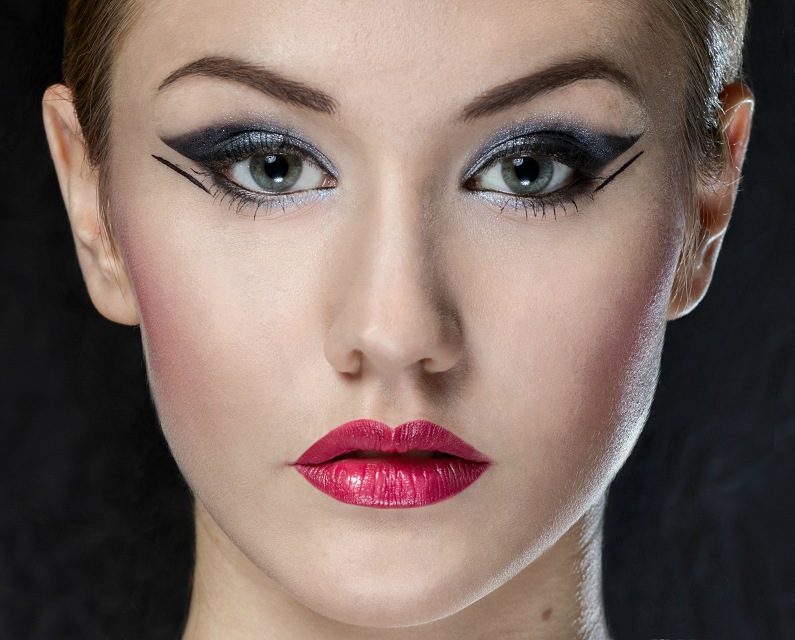
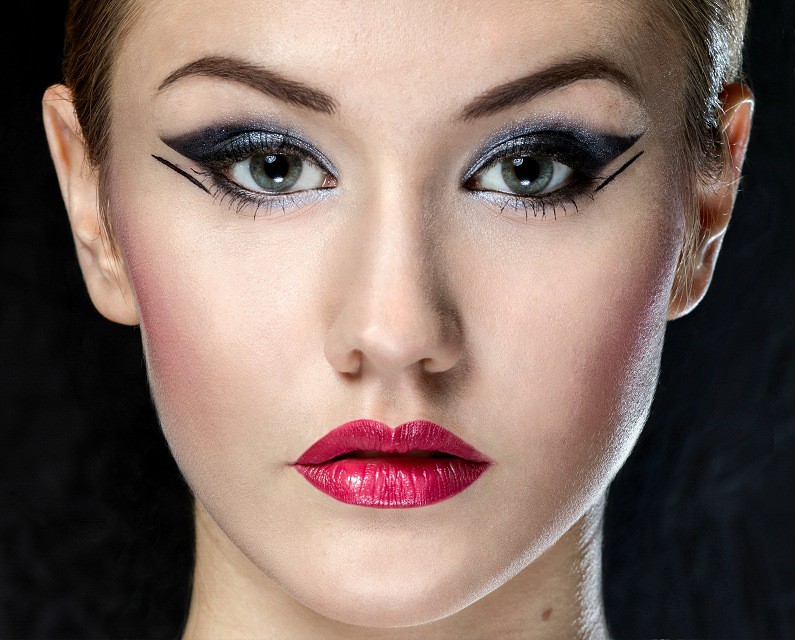
FOTOR
We’re going to handle the same photo using free online editor fotor.com
Step 1. Removal of unwanted hair.
Tool Stamp is called in this program Clone. It works bad and decelerates a lot, which leads to the impossibility of its practical use. In general, we can only remove superfluous objects from the solid background.
Step 2. General liquefaction.
The editor doesn’t have liquefaction instruments at all. There is only a tool, called Weight, which simply reduces the entire photo. As a result of the liquefaction, we’ve managed to correct the nose a little.
Step 3. Elimination of major flaws.

The tool called Removing Deficiencies decelerates a lot and does not work well. It is better to use Clone. The tool used for the removal of wrinkles works poorly as well. It strongly dilutes the image leaving spots or doesn’t give any result at all.
Step 4. Removal of light and shadow spots.
This step had to be skipped due to the absence of necessary tools needed for this stage.
Step 5. Detailed representation of light and shadow pattern.
This step also had to be skipped due to the absence of necessary tools needed for this stage.
Step 6. Lightening of whites of the eyes.
We have skipped this step because we could not find the necessary tool.
Step 7. Adding expressiveness to the eyes.

The tool works well but its usage requires a paid subscription. It is impossible to use Eyeliner because of buzzing. It is better not to use the Smooth tool because it spoils the texture, diluting it and leaving spots.
Step 8. Retouching of the eyebrows.

Step 9. Retouching of the lips
We have skipped this step because of the lack of needed tools. There is a function to change the lips color that works well, but it has one drawback – it requires a paid subscription.
Step 10. Work with the sharpness.
There are tools for the work with the sharpness, but they do not work well. We didn’t use them and skipped this step.
Step 11. Color Correction.
We have managed to change color a little. There is the Curves tool, but, as in PIXLR, it doesn’t have enough flexibility.
Comparison of the results and outcomes:
PHTOSHOP is a professional program for editing any photo.


As a result of the retouching, we have received a quality hi-end photo.
PIXLR is a free online editor that visually and functionally is similar to Photoshop, which is a plus for more experienced users who are familiar with Photoshop. When processing a photo this program can buzz.

The results of eretouching the photo in the Pixlr online editor cannot be called hi-end photo editing process. In addition, for a beginner who does not have experience in working with such programs, the use of Pixlr is quite complex and time-consuming.
FOTOR is a paid online editor designed for novice users. It buzzes more than PIXLR and does not support the high resolution (max 8 Px). It has many languages. Some instruments don’t have an Undo option. It is only possible to undo the whole result, this creates difficulties in the work and takes a lot of time.
As a result, the photo became only slightly better.