
Face correction in Photoshop
May 14, 2017 at 6:48:51 PM GMT+3Contents
The lesson is devoted to face editing, these tutorials will tell you in detail how to face aware liquify in Photoshop and are divided into two parts: retouching of facial features and correction of facial features.
We also recommend you to read the articles:
These links lead to the lessons directory, which contains simple but effective techniques for photo retouching.
Retouch face features and head shape
If you want to change the face or head shape, we recommend using the Liquefy filter. In this case, it is important to ensure that you do not change those parts of the face that do not require changing. So initially you need to spend a little time to isolate fragments of the face, which will be adjusted, and which — not.
Step 1
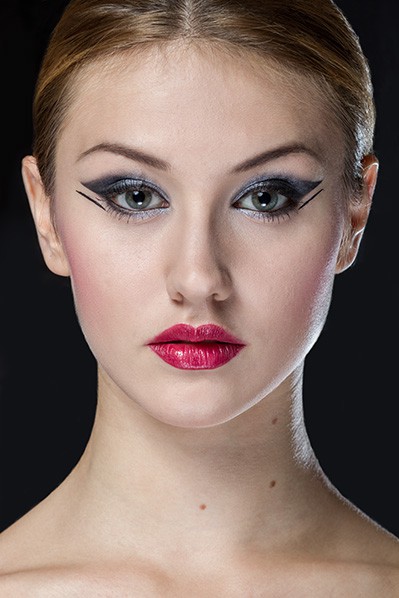
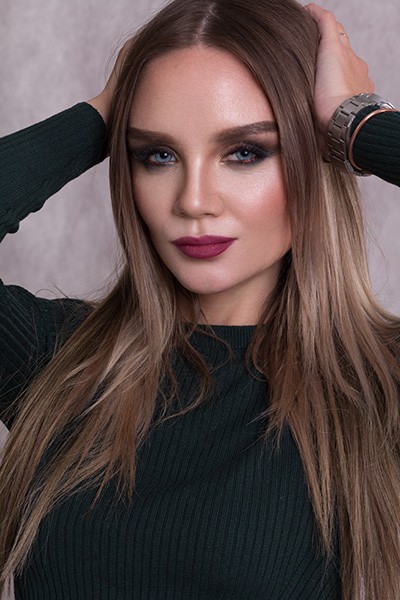
Here is a typical example of a portrait photo, that looks as if it is an ad from the billboard of the cosmetics company. Model’s hair is gathered in a ponytail. And we can see some flyaway hair around the neck.
Before starting to work, we need to remove all the excess pieces of skin and background. For this, we use the Stamp tool (how to use it is described in detail in the article).
Step 2
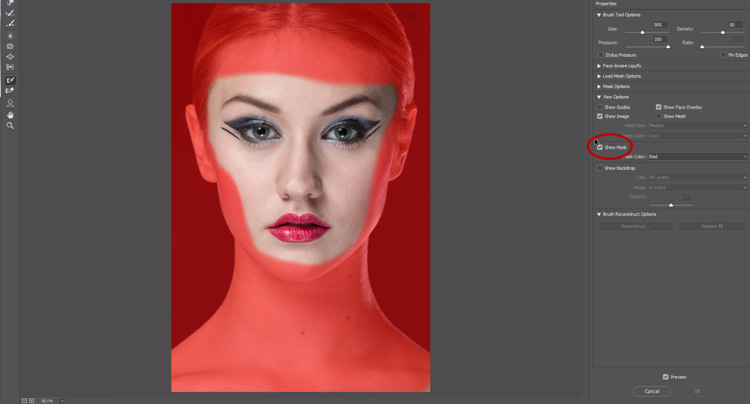
In the Filter menu, choose Liquify filter. In the filter dialog box select the Freeze Mask tool (< F>). The tool (in the picture it is marked with red) can be found on the filter toolbar (if you don't have this tool, put a check button in Advanced Mode). Now using the Freeze Mask tool paint all the fragments of the person that you want to protect from changes. In other words, sketch the fragments that must remain intact. As we draw the fragments that we want to keep unchanged, they are colored in red. If you accidentally paint those pieces that you want to modify, you can always use the Thaw Mask tool to draw these fragments and restore the ability to edit them (this tool is located directly below the Freeze Mask tool).
Step 3
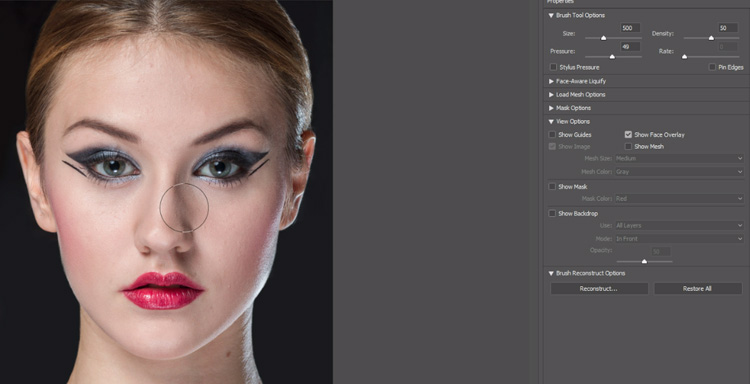
Now, when all the fragments are "fixed", you don't need this distracting red color anymore. So it does not interfere, deselect Show Mask in the View Options parameter (the checkbox is marked in the figure). Now use the Forward Warp tool (<W>). Choose a bit larger than the editable area brush and with light, short movements drag the edges of the model's nose towards the center. The size of the brush allows you to move the edge of the selected element as a whole, not the individual fragments. When you use a brush of a small size you can distort the piece of a nose and that will require being corrected. This is the case when the size of the brush matters. Just remember that you need to do this with short gentle strokes.
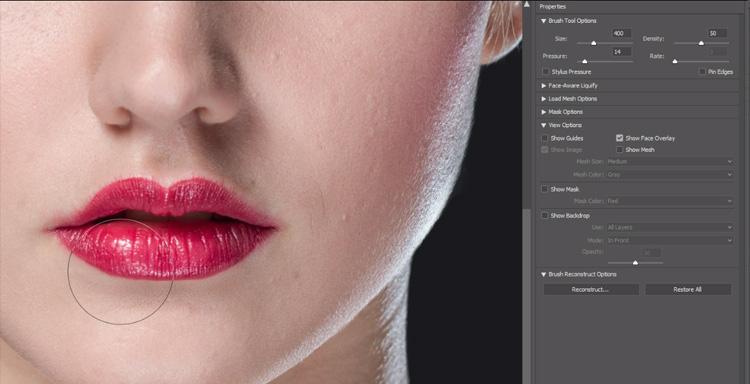
Note: be careful not to lose the sense of proportion in working with this filter. It is very easy to get carried away and as a result, the photo will not look natural.
Step 4
Follow the same steps with the lips. For more convenience, you can zoom in the part of the image. We perform the same light and short strokes of the brush tool if necessary changing its size. Now when we have corrected the lips a bit, you should pay attention to the fragments of the left ear.

Step 5
For further action, we will use the same method that was used to change the shape of the nose.
Before starting, don't forget to “defrost” the area with the ear. To do this, reopen the Liquefy filter dialog box and use the Taw Mask tool. Then use the Forward Warp tool and select a brush size which is slightly less than the ear. Only the upper part of an ear needs to be changed. As in the previous step, using short careful strokes in the direction of the model's head, change the image. This can be done with just a few movements of the cursor.

Video tutorial how to retouch face in Photoshop
Correction of facial features and add volume by lightning and darkening
This is an old technique of darkening and lightening of the natural shadows and light areas in the model's face, which allows you to make the image more contrast and add depth to it. As a result, the picture becomes more pleasant for visual perception. Using the described method, you can add so much volume to the image, so do not be lazy to use it to retouch each photo. This technique is one of the essential final touches when retouching portrait photos.

Step 1
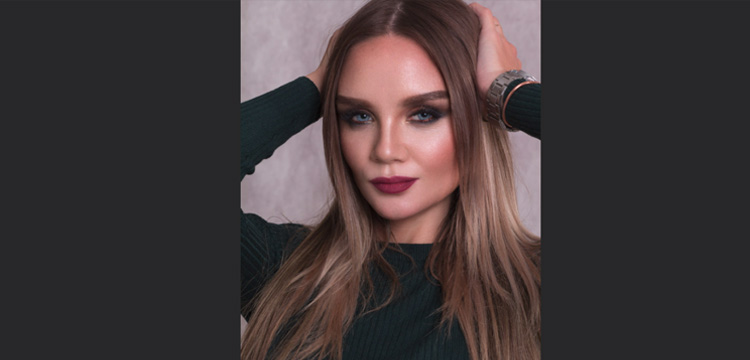
Here is the image that will be used to demonstrate this method.
Note: before you start, you need to remove all the skin imperfections in any convenient way. Otherwise, the further work on this lesson will only spoil the photo. Tools of lightening or darken will be used to add volume to a portrait photography in this example. Do not confuse it with the technique of smoothing the skin, when professionals use the same tools to pixel by pixel smooth skin color and texture. We have used this method.
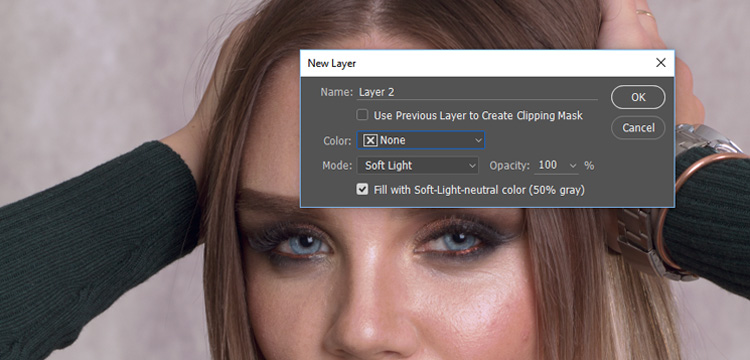
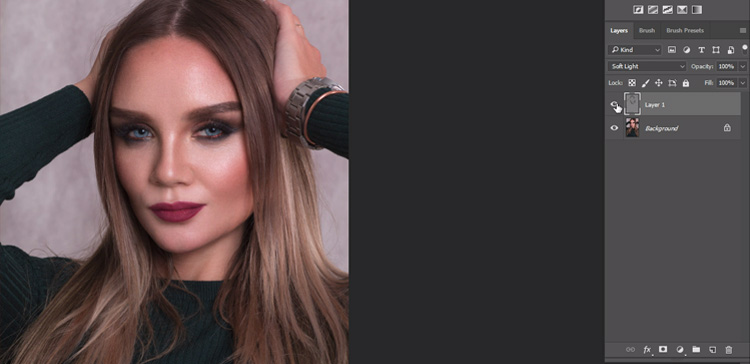
First of all, at the Layers panel menu click on the New Layer.
In the dialog box, change the blending mode of the new layer to Soft Light, and select Fill with Soft-Light-Neutral Color (50% Gray) and click OK.
Step 2
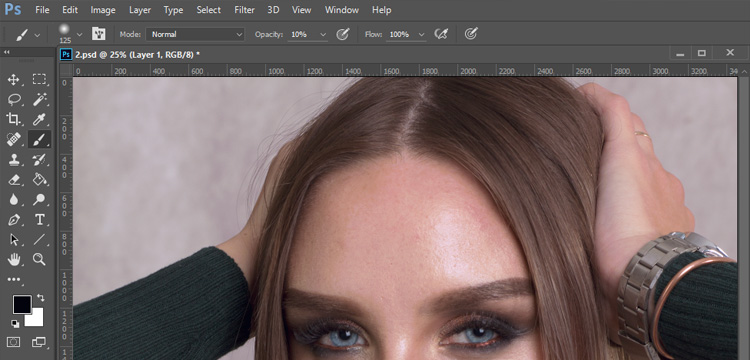
Use the Brush tool (<B>) and select a brush of medium size with soft edges.
In the options bar, reduce the opacity of the brush to 10%. This allows you to consistently and accurately apply several brush strokes. (Users of graphics tablets can leave 100% Opacity of the brush, while the Pressure Sensitivity option is enable, which adjust the opacity of the strokes by pressing the pen).
Step 3
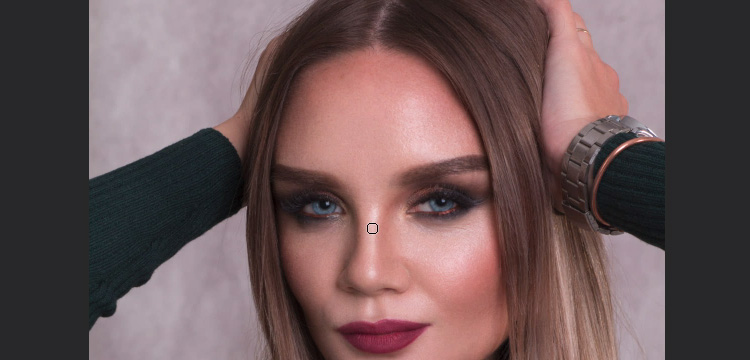
On the created layer we are going to draw the dark parts of the image with the black color to make them darker, and the light parts will draw with white to make them even lighter. This will increase the depth of the image, highlighting the main features of the model. After setting the black color as the main color of the image on the toolbar, we did a few brushstrokes on the forehead of the model to darken the dark area. So what fragments should be darkened? In fact, we will dark the area under the lower lip and lines along the cheekbones on both cheeks and forehead.
When you sketched all the dark areas of the skin, you can move on to the highlighting of the light fragments. In order to do this, set white as the dominant color on the toolbar.
Note: after the darkening of the fragments in the model's face, follow to darken all the dark fragments in her neck, shoulders, and arms. In the process, you may shade the dark fragments a bit stronger than it is required. You can always weaken the effect later by changing the opacity of the layer. It helps to easier evaluate the obtained results.
Step 4
Now we can lighten the image on the same layer or, for greater control, perform all transformations on a separate layer (in order to subsequently obtain the ability to separately change the effects of darkening and lightening). If you decide to work on a separate layer, create the same layer that we created in step 1. If the main color in the toolbar is white, then you can start to sketch light fragments with the same brush to make them even lighter. At first, we make a brush stroke at the center of the forehead and nose. Lighten all the bright areas of the person’s face. Don't forget to paint along the natural contours of the face. For example, apply long brush strokes from the bottom of the chin to the cheeks.
Step 5
So what fragments should be lightened? Typically, we lighten all of the light areas. Lighten the central part of the nose, bright areas of the cheeks (right next to the dark fragments located on both sides of the nose), the central part of the forehead and chin, small pieces right above the upper lip, the area above the eyes over the applied makeup (shadows).
In the process of drawing, you will need to constantly change the brush size, increasing or decreasing it.
Step 6
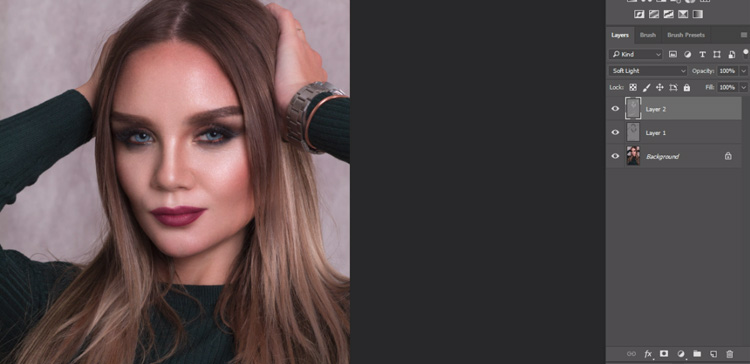
We continued sketching the light fragments of neck, arms, shoulders. In General, we painted all the light fragments on the skin of the model.
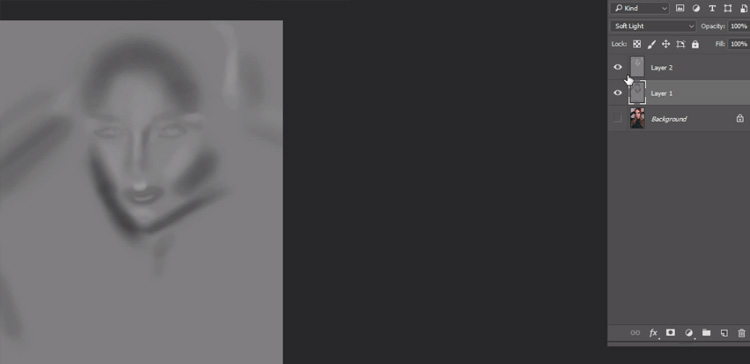
In fact, we made all the light fragments even lighter. On the layer thumbnail on the Layers panel it can be seen how the darkened and lightened fragments are divided on a grey background. At this stage, you feel that we are overly darkened and highlighted the fragments of photos, and indeed it was so. But don't worry about it, because retouching of photo is not finished yet.
Step 7
We turned off the visibility of the background layer, so we could evaluate the results of the work done. The light and dark brush strokes are displayed on the grey background. As seen in the image, the brush strokes turned out to be insufficiently soft at the edges, so the next step in the retouching process of this photo is very important. This is one of the last two steps, which will help us to adjust the quality and impact of the created effect.
Step 8
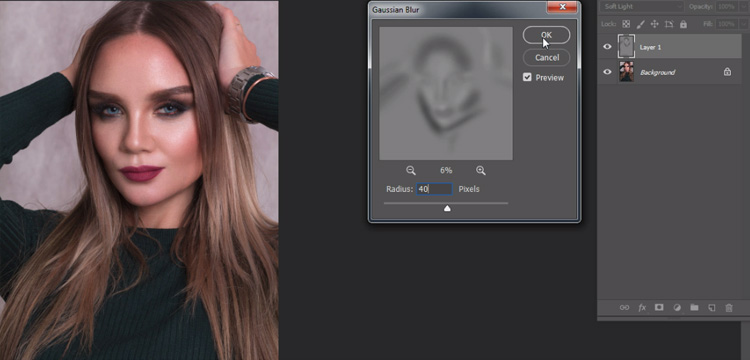
Restore the visibility of the image background layer to see better what is happening with your effect. To feather the brush strokes, run the command Filter -> Blur -> Gaussian Blur. Now, thanks to the blur the brush strokes are much smoother, and almost invisible on the original image. In the Gaussian Blur filter dialog box, drag the Radius slider to the right hard enough to blur earlier applied brushstrokes (in this case, we chose a value of 40).
Resetting the Preview checkbox in the filter dialog box, you can assess the influence of the selected blur parameters to the effect and to choose the best value of the Radius parameter. After reaching the desired effect, click the OK button. Now we can change the degree of the created effect by changing the Opacity value, which is available at the top of the Layers panel. If the brightening and the darkening of the image were performed on different layers, you need to adjust the opacity of each layer separately. We reduced the opacity to 83%. In this case, we chose such a value to make the effect more distinct.
Video tutorial