
Darkening the rims of the iris
February 3, 2017 at 1:37:57 AM GMT+2Contents
This lesson is part of a larger section on enhancing eyes photos in Photoshop. For a more detailed study of photo retouching we recommend you to read the other articles on the topic:
- Contrast enhancement in the pupil
- Darkening the rims of the iris
- Add expressiveness to the eyes
- The creation of new and adjustment of existing glare
- Lightening the whites and the orbits of the eyes
- Remove the red veins in the eyes
- Change the color of the eyes
- Increase and decrease the size of the eye
- To replace one eye with another
- Retouch of the eyelashes
- Correction of the shape of the eyebrows
- The creation of thick eyebrows
- Darkening the eyebrows
- Sharpening the eyes
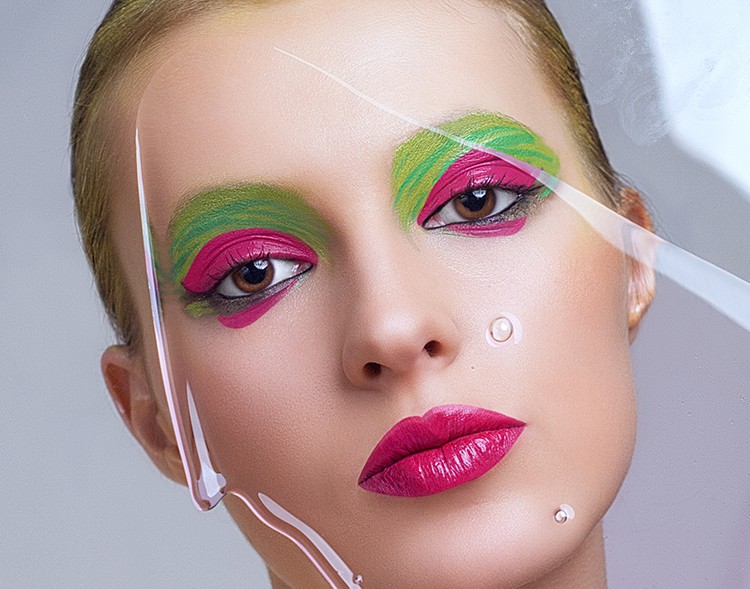
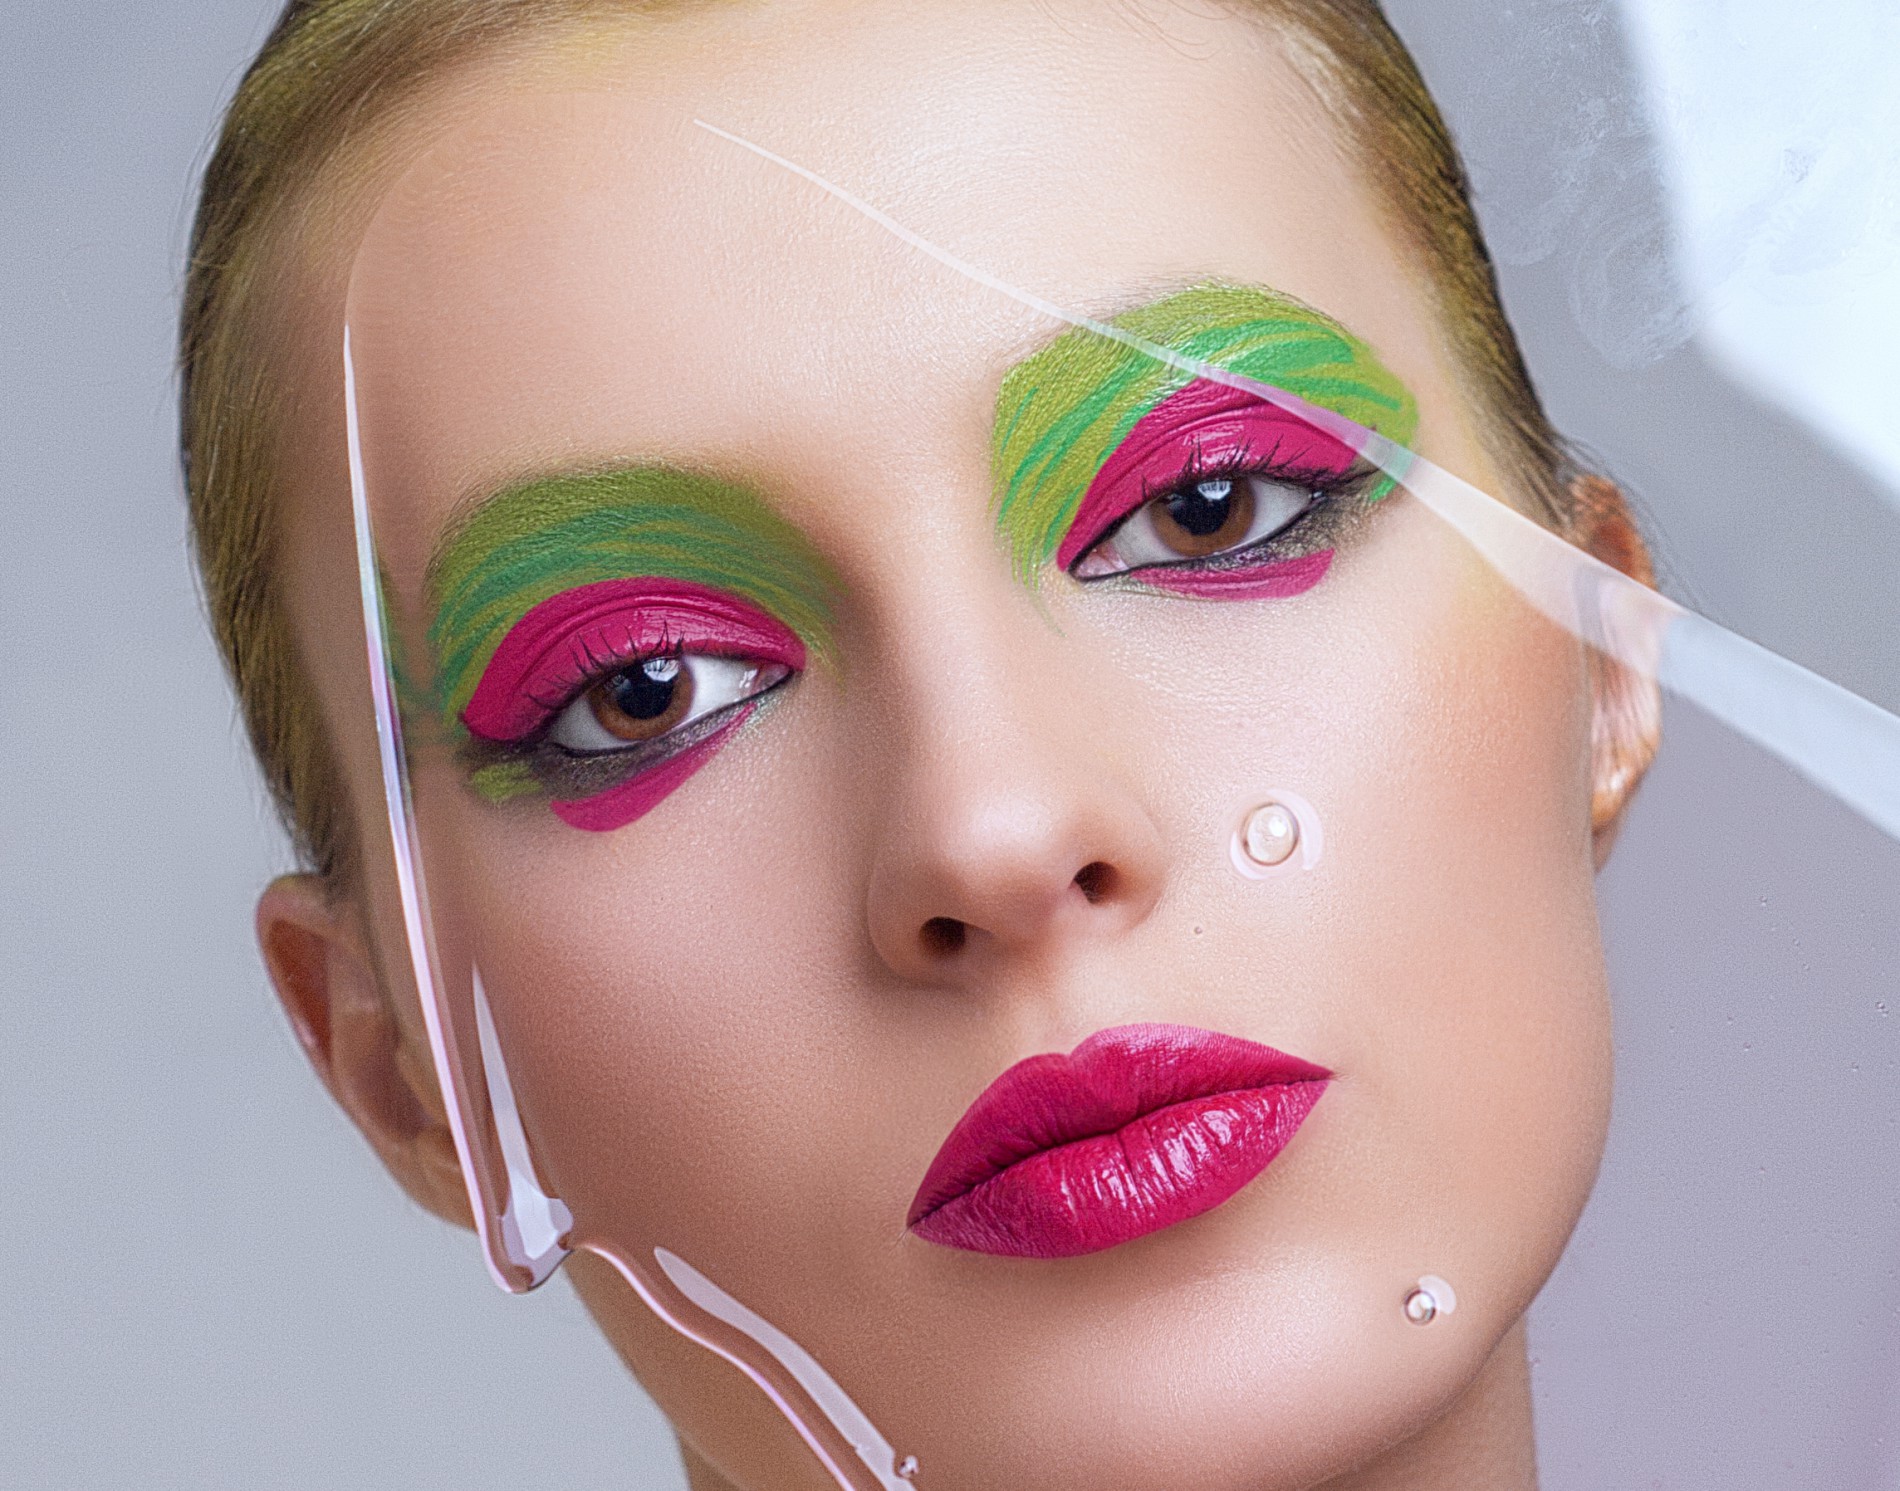
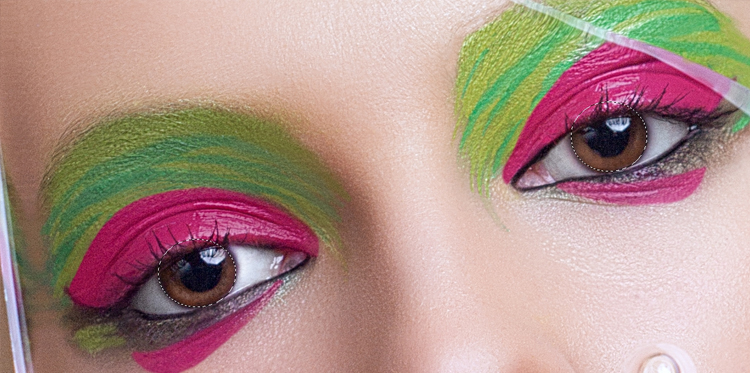
You can notice a dark rim around the outer edge of the iris. Dimming of the rim helps improve the appearance of the eyes in the photo. This is one of those small details that are not noticeable but in conjunction with other details discussed in this chapter, they allow to retouch eyes to a whole different level.
Step 1
Enlarge the eye section and then activate the Elliptical Marquee instrument and highlight the entire iris of one of the eyes. Don’t worry if the highlighted area extends slightly above or below the iris.
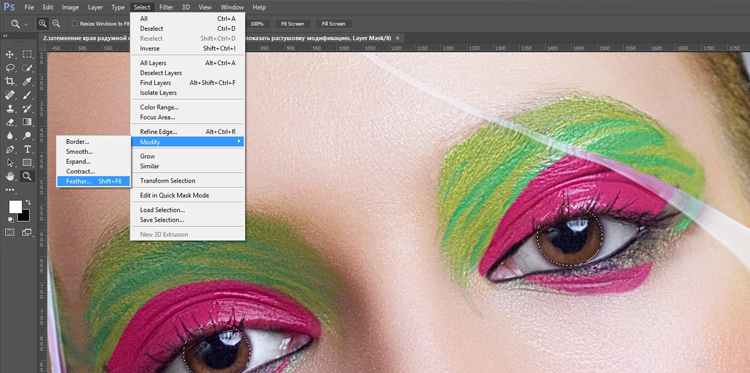
Step 2
In the Selects -> Modify menu, choose Feather. In the Feather Selection dialog box, set the feather radius value appropriate to your photo (for example, 5 px).
As a result, the retouching will look more natural as compared to the rest of the iris.
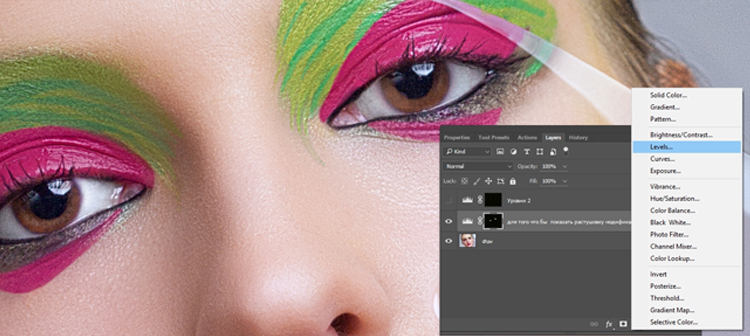
Step 3
Click Create New Adjustment Layer and Levels in the emerged menu. Since there is a highlighted area on the picture, the mask will be automatically created on its basis.
As a result, there will be a black mask with a "cut out" fragments in the eyes area.
Step 4
At the top of the Layers panel, alter the blend mode for this adjustment layer into Multiply. This will significantly darken the iris and pupil. However, we need to darken only the outer radius of the iris. Therefore, it is necessary to correct the situation. Hold the <Ctrl> (<⌘>), click on the black mask to renew the highlighted areas.

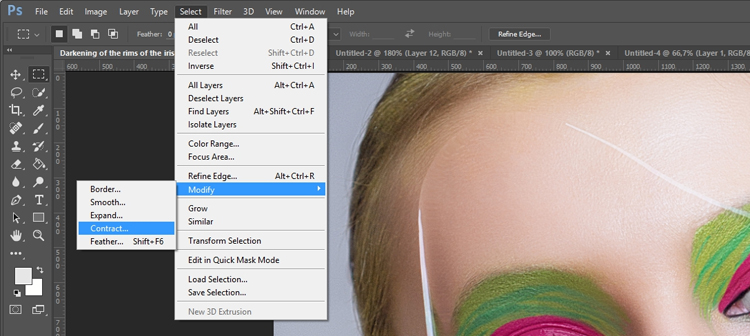
Step 5
Now you need to slightly decrease the size of the highlighted sections on the iris of the eyes. In the Selects Modify menu, click Contract. In the Contract Selection dialog box, enter the desired value (for example, 3 pixels), and click OK. As a result, the highlighted areas will be compressed by three pixels throughout the radius.
Step 6
Set white as a basic color and then click the <Backspace> (<Delete>) key to "cut" a central part of your darkened version of the iris. As a result, there will be a darkened section around the sides of each of the irises, which looks completely natural. You can remove the highlighted using the key combination <Ctrl + D> (<⌘ + D>).
Step 7
The only thing that is left is to eliminate the extra sections that we have highlighted above each of the irises. To do this, hold the <X> key to alter the basic color of the picture into black. As a result, when you draw, you will be able to mask the previously darkened sections. Click <B> to activate the Brush instrument and find a tiny brush with soft edges. Carefully sketch a section above each of the irises, trying not to eliminate the dark edging around each of the irises, which we have just made. To control the removal of all unnecessary details above the iris, enable or disable the visibility of the adjustment layer. You will instantly see if there are any extra sections in the eye area. In this case, simply sketch these sections with black.
Step 8
Let’s say you want to slightly alter the shade of the "stroke" on the sides of the iris. Since the mask has already been created, it is very simple to alter the brightness of the element. Go to the Adjustments panel and pull the gray color stop below the histogram image to the right to make the rim darker, and pull it to the left to lighten it a little.

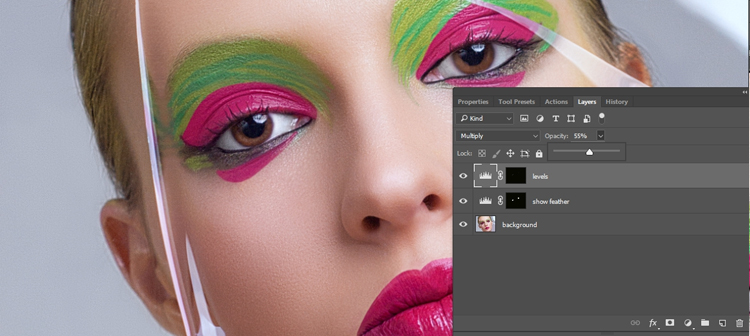
Step 9
The retouching effect can also be configured with the Opacity for the adjustment layer. In this case, lower the opacity of the adjustment layer to 55%, since the outer rim of the iris appeared too dark. This step is not necessary if you’ve adjusted the position of the color stop of midtones in step 8. Most probably, you would like to alter the opacity immediately after changing the blend mode to Multiply (before setting the correction Levels in step 8).
Video tutorial: Darkening the rims of the iris