
Enlarge or reduce the eyes
February 21, 2017 at 1:01:21 PM GMT+2Contents
This lesson is part of a larger section on eyes photos in Photoshop. For a more detailed study of photo retouching we recommend you to read the other articles on the topic:
- Contrast enhancement in the pupil
- Darkening the edges of the iris
- Add expressiveness to the eyes
- The creation of new and adjustment of existing glare
- Lightening the whites and the orbits of the eyes
- Remove the red veins in the eyes
- Change the color of the eyes
- Enlarge or reduce the eyes
- To replace one eye with another
- Retouch of the eyelashes
- Correction of the shape of the eyebrows
- The creation of thick eyebrows
- Darkening the eyebrows
- Sharpening the eyes
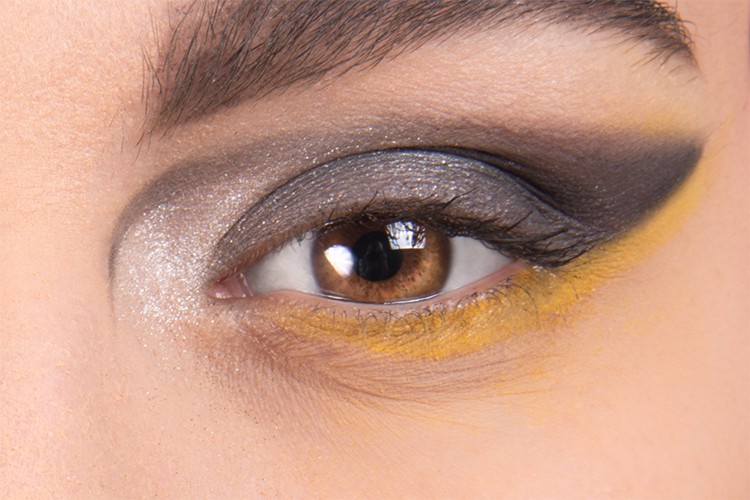
This is a very common method of retouching, especially for models portfolio. (People usually like big eyes. View cartoons of Disney studio and pay attention to the size of the eyes of cartoon characters. They are huge! But look great.) Will consider how to make the eyes a bit bigger and also another method how to make them smaller.

Step 1
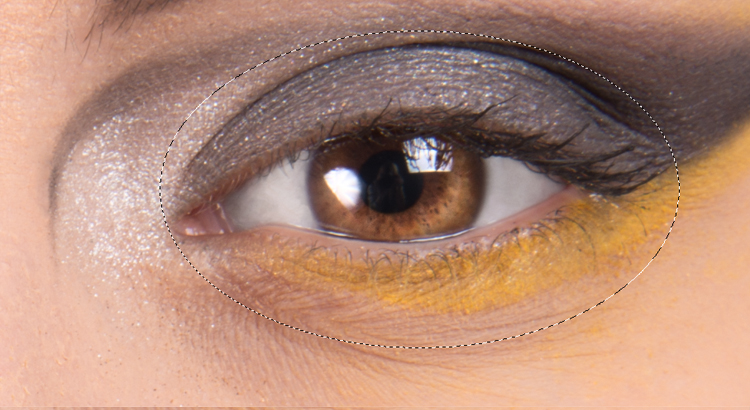
Select the Elliptical Marquee tool on the toolbar. Create an oval shaped dedicated area around the image of the eye. Make sure that the selected area includes all the lashes, but don't do it more than necessary. If you want to move the selected area after its creating, just hold down the left mouse button.
Step 2
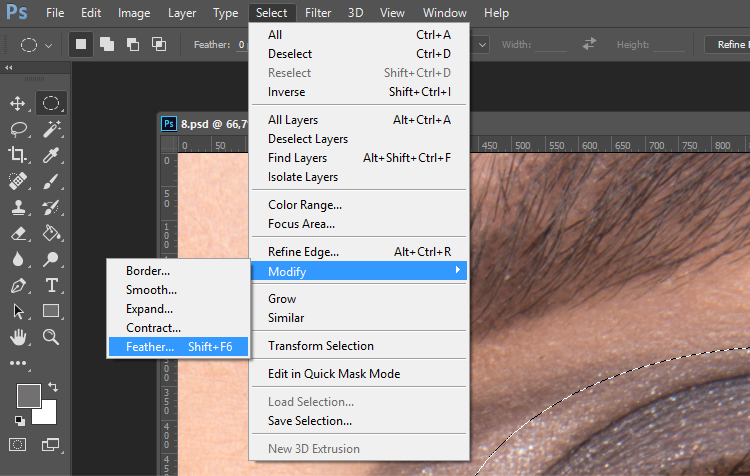
To hide the retouching actions, we soften the edge of the selected area by adding a feather. In the Select menu choose Modify -> Feather. In the dialog box ‘Feather Selection’ set the value to 10 pixels and click OK. This will feather the edge along the entire oval area.
Step 3
Now you need to copy the selected area with the image of the eyes to a separate layer. In order to do this, press the key combination < Ctrl + J > (<Ctrl + J >), and then use the key combination < Ctrl + T > (<Ctrl + T >) to run the Free Transform command. As a result, around the copied layer with the image of the eye a bounding frame will appear.
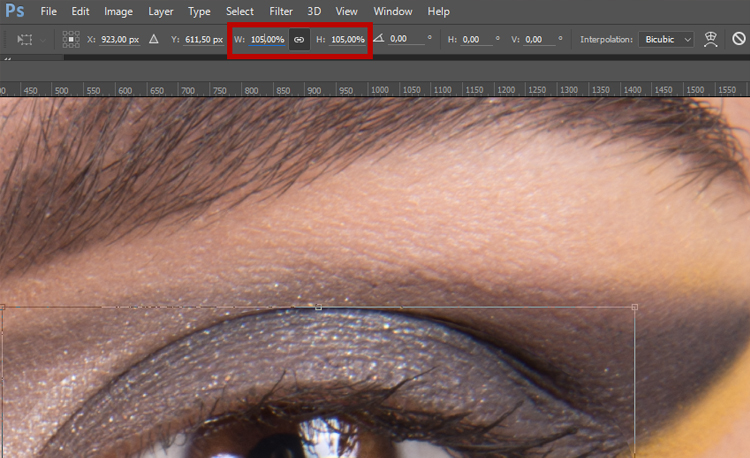
Step 4
Fields ‘ W’ for width and ‘H’ for height are available in the settings panel. Click on the small icon in the form of a chain link between these two fields to link the values specified. Thus, when you change the width the height, it will change proportionally. Now enter the percentage value to any of these fields to zoom in the selected area. Start with a value of 105% and you will see that the size of the eye increases. It depends on the specific image, so proceed at your own discretion. If an increase to 9 or 10% makes the picture looking good, then select this option. To made the conversion took their effect press < Enter > (< Return >).
Step 5
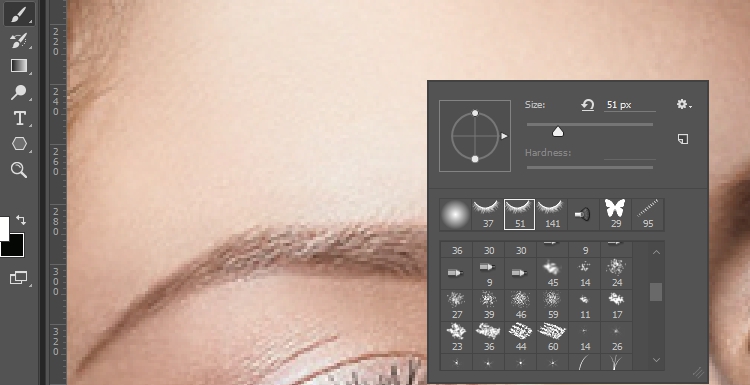
As we have feathered the edge of the selected oval area, it is likely that initially you will not notice any overlays. But with a significant zoom in you can find extra pieces of skin that are superimposed on one another or something similar. These flaws are quite easy to fix. Click on the Add Layer Mask icon at the bottom of the Layers panel. Press <X> to set black color as the primary, and then press < On > to activate the Brush tool. Select a medium size brush with soft edges in the options bar. Now on the background layer of the image paint the edges of the enlarged eye to make it fit the surrounding facial skin. You may have to make changes around the eye, however try not to remove the eyelashes.

Step 6
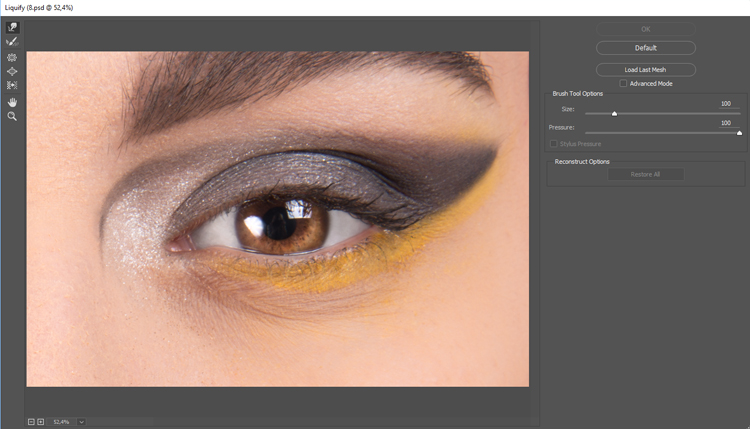
Another way to enlarge the eyes is to use the Liquify filter. This method is better to use when you need to increase only the size of the iris without enlarging the rest of the eye and eyelashes. However, using this method it is possible to enlarge the whole eye. So, let's start.
In the Filter menu select Liquify to open a dialog box, as it is shown in the figure. In the left part of the dialog box, select Zoom in the toolbar and zoom in on the eye.
Step 7
Select the Bloat tool on the toolbar. Choose a brush which size is a little bigger than the eye image. Here's another key combination, as you'll often have to change the brush size when working in this dialog box: hold down <Shift>, press < [>to decrease the brush size, or press <] > to increase the brush size. These shortcut commands allow you to increase or decrease the brush size in increments of 20 pixels. Now hover over the left part of the eye and double click to zoom in on that part of the eye.

Step 8
Move a brush to the center of the eye again, double-click to zoom in on this area of the eye. (By the way, if you want to increase the size of the iris only, start with the center of the eye and click twice or three times. This brush creates the effect of protrusions from the center to the edges, which is great to increase just the iris.) As there is a “swelling" of the fragment under the cursor of the brush after each click, you need to keep parity moving the brush from left to right: if you once clicked on the left part of the eye, then you need to click once on the right side. You don't need to draw using this tool – just clicking.


Video tutorial:
Method 2