
Create highlights in the eyes
February 6, 2017 at 4:07:05 PM GMT+2Contents
This lesson is part of a larger section on retouching eyes photos in Photoshop. For a more detailed study of photo retouching we recommend you to read the other articles on the topic:
- Contrast enhancement in the pupil
- Darkening the edges of the iris
- Add expressiveness to the eyes
- Create highlights in the eyes
- Brightening the whites and the orbits of the eyes
- Remove the red veins in the eyes
- Change the color of the eyes
- Increase and decrease the size of the eye
- To replace one eye with another
- Retouch of the eyelashes
- Correction of the shape of the eyebrows
- The creation of thick eyebrows
- Darkening the eyebrows
- Sharpening the eyes
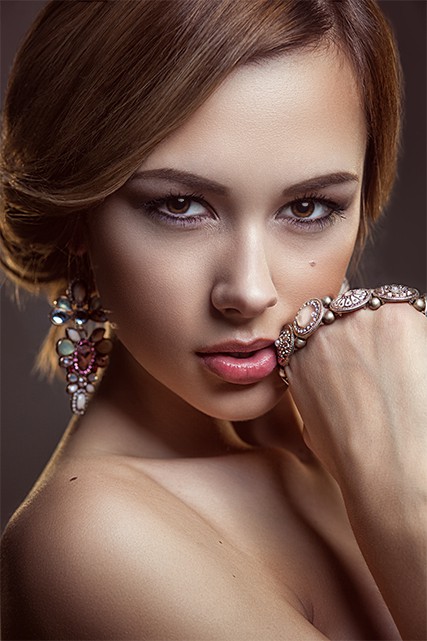
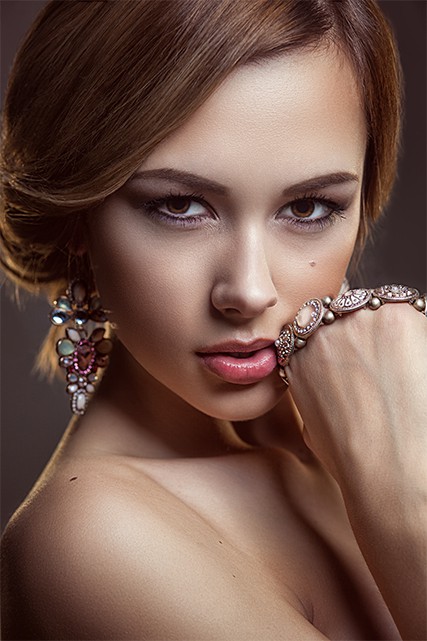
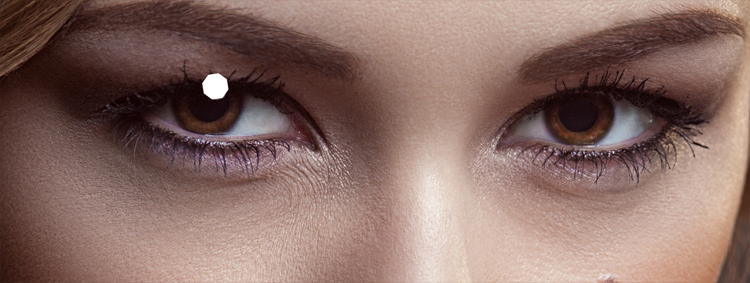
Highlights in the eyes of a photographed person are the bright spots reflecting the light sources, falling on the person's face. These light areas allow you to add sparks into the eyes to make them look more vivid and deeper (now the eyes don't look like some dark body of water with nothing in it). When shooting outdoors, the highlights in the eyes will look like round dots (the reflection of the sun). However, when shooting with the studio lighting, you can see not only a source of lighting in the eyes, but also the position of your soft box or umbrella. Let’s consider the ways of improving highlights that appears in the eyes, as well as creation of these highlights during their absence.
Step 1
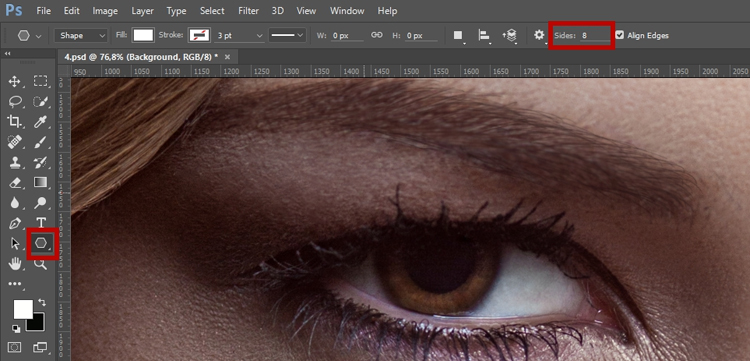
To begin with, we will increase the fragment of the eye. Create a new empty layer. Now you need to choose what light source reflection (soft box or umbrella) we are going to create in the eyes of the model. If you want to create a standard square or rectangular reflection of a light from the soft box, use the Rectangular Marquee tool. If the round portrait reflector (Beauty Dish) was applied when taking a photo, or you would like to create an impression that the photo was taken in natural lighting, use the Elliptical Marquee tool. To make a reflection perfectly round hold down < Shift> when creating a dedicated area for the future highlight. If you want the reflection to look like the reflection of an umbrella or a large octagonal soft box (so popular in the portrait photography), then activate the Polygon tool. After that, set the value to 8 on the panel of the option ‘Sides’.
Step 2
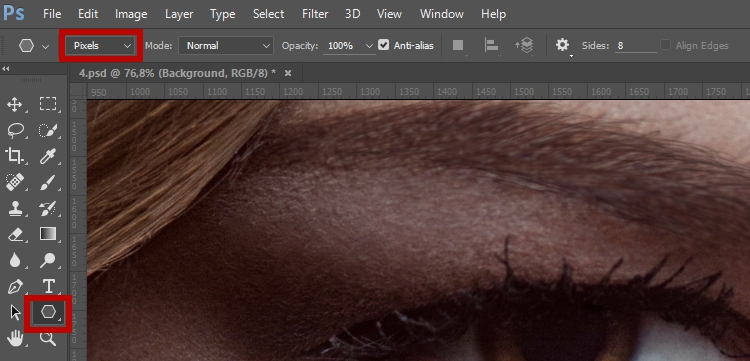
When you use the Polygon tool first of all make sure that you are working in Fill Pixels mode. To select this mode, click on the appropriate icon on the options bar. This will allow you to draw using pixels and not to create a shape or contour. Press <D>, then press < X > to set as the primary white color. Activate the Polygon tool and create a small figure of an octagon in the area of the pupil where you want to add the reflection of the light. If you use the Rectangular Marquee tool or Elliptical Marquee, set white color as the main and create a selection. Then fill the selected area with white color using the key combination < Alt + Backspace > (<Option + Delete>). Deselect by using keyboard shortcuts < Ctrl + D > (<Ctrl+ D>).
Step 3
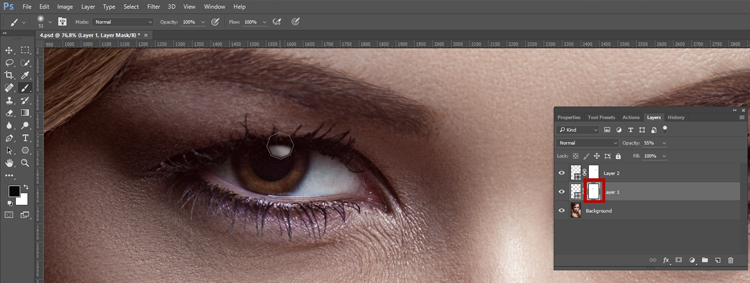
If the reflection of the light source you created superimposed on the eyelid or eyelashes (as in this case), then click on Add Layer Mask at the bottom of the Layers panel. In the upper part of Layers, decrease the Opacity to such an extent, that it became transparent and you could see the eyelashes below the highlight. Press < X > to set black as the main color, activate the Brush tool, select a small brush with soft edges and do the drawing over the area where the eyelashes should appear.
Step 4
Now we need to restore the opacity of the layer with the created reflection to make it look natural. Here we used the 55% value of the parameter Opacity and the highlight started to look natural. At the moment we have edited the image of one eye only, so press the key combination < Ctrl + J > (<Ctrl + J >) to duplicate the created light. Using the Move tool drag the layer with the duplicated reflection to the right to create such a highlight in the right eye, as shown in the figure. However, when there is a real glare on the part of the pupil and iris, you can see a gradual color change from light to dark in the pupil. This happens because the pupil absorbs sunlight, and the reflection of the light in the pupil is usually darker than in the iris. To make the light reflection more natural, lower the opacity of the brush and then paint with the black color on the mask over the image of the pupil.
As a result, the reflection will be darker.
Video tutorial: Create highlights in the eyes