
Changing and color correction of the eyes
February 21, 2017 at 12:44:31 PM GMT+2Contents
This lesson is part of a larger section on retouching eyes photos in Photoshop. For a more detailed study of photo retouching we recommend you to read the other articles on the topic:
- Contrast enhancement in the pupil
- Darkening the edges of the iris
- Add expressiveness to the eyes
- The creation of new and adjustment of existing glare
- Lightening the whites and the orbits of the eyes
- Remove the red veins in the eyes
- Change color of the eyes
- Increase and decrease the size of the eye
- To replace one eye with another
- Retouch of the eyelashes
- Correction of the shape of the eyebrows
- The creation of thick eyebrows
- Darkening the eyebrows
- Sharpening the eyes
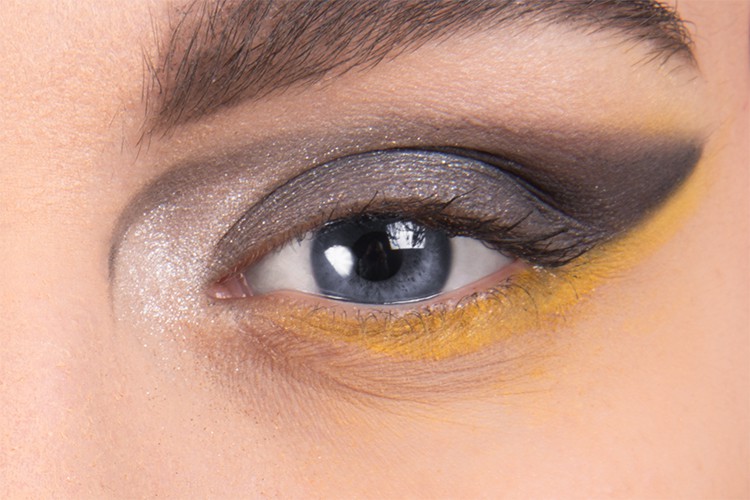
Usually you do not need to change the color of the eyes in portrait photos. But there are times when you need to change the eyes color to match the color of the clothing, surrounding background or for any other reason. Fortunately, this is one of the simplest methods of retouching.

Step 1
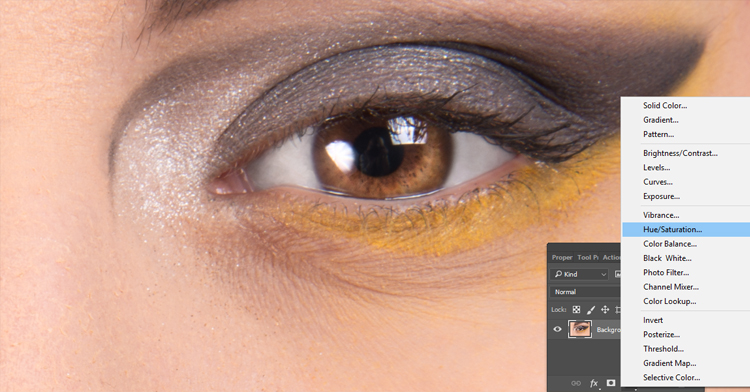
The model in this photo has brown eyes and we need to make them blue. Start your retouching with a click on the icon Create New Adjustment Layer at the bottom of the Layers panel. Then select Hue/Saturation in the drop-down menu.
Step 2
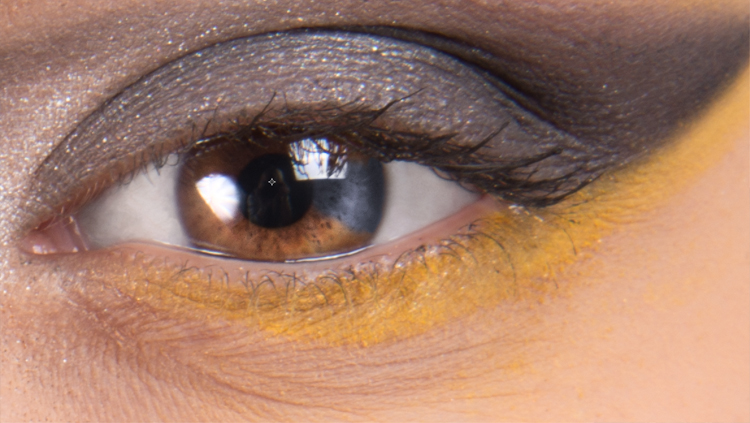
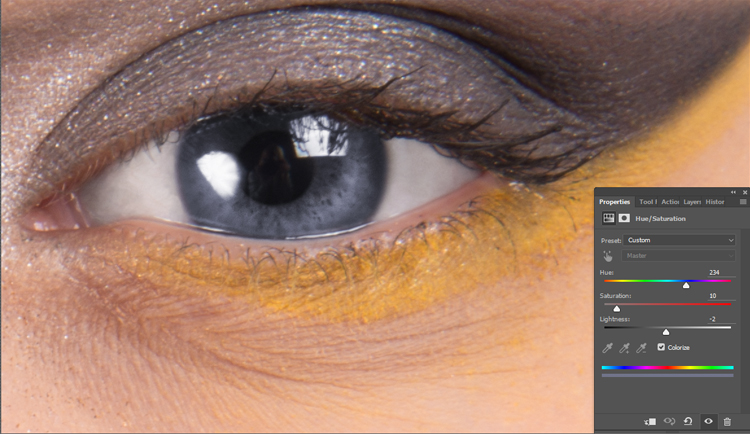
Zoom in on the eye. Select Colorize at the Adjustments panel to change the eye color. Use the Hue slider to select the blue color. As a result, all the image will become blue. We will correct this in the next step. Reduce Saturation for example to 10, that will reduce the intensity of the blue and make it more natural. If necessary, you can slightly reduce or increase the brightness with the Lightness.

Step 3
To remove this blue tint on the entire photo, press the key combination < Ctrl + I > (<⌘+ I>). This will allow you to invert the adjustment layer mask and to hide the version with a blue tint. Activate the Brush tool and select a small brush with soft edges on the brush palette. Set white as the main color and paint irises of eyes in the picture (do not paint the pupil). The eye color will change to blue when drawing.
Step 4
Reducing the value of Saturation and a small setting of Lightness will allow you to get natural eye color. Of course, you can reduce the opacity of the adjustment layer in the Layers panel to make the blue less intense.
Video tutorial: